This recipe is going to have two parts–how to properly prepare the rice itself on the stove (it’s a pretty involved process) and how to make the onigiri itself. It’s also important to note that you’ll need a specific kind of rice to make this recipe: Japanese short grain rice. Most of the rice you usually find in bulk at grocery stores is a long or medium grain, so you might have to double check what you already have in your kitchen and make a special trip to the store. Long and medium grain rice won’t work for this recipe because the onigiri won’t stick together properly and will immediately fall apart!
This recipe makes five rice balls.
Ingredients:
- 1 cup Japanese short grain rice
- 1 ¼ cup water
- 1 tsp salt, divided
- Nori to garnish
- Furikake to garnish (optional)
Rice Preparation Directions:
- Thoroughly wash your rice. You can either put it in a strainer and run it under the faucet, stirring with your hands until the water underneath runs clear, or put it in a large mixing bowl with tap water, stir with your hands, dump the water and repeat five or six times. (I’ve tried both, they both work fine.)
- Once clean, transfer your rice to a large mixing bowl and fill it with more water. Let the rice soak in the water for at least 30 minutes.
- Transfer rice to a fine mesh strainer to drain the water and let it sit in the strainer for at least 15 minutes to dry the rice grains.
- Transfer rice to a large pot and add 1 ¼ cups water.
- Cover and heat on medium-high heat. Only lift the lid quickly after about 5 minutes to see if the water is boiling, but otherwise DO NOT LIFT THE LID.
- Once the water is boiling, lower the temperature to low and cook covered for about 15 minutes. Remember, DO NOT LIFT THE LID. We want as much steam as possible trapped inside!
- Remove pot from heat and set aside to rest for at least 10 more minutes, and once again… DO NOT LIFT THE LID!
- Once it’s finished resting, now you may open the lid and fluff your rice!
Onigiri Directions:
- Line a small bowl with a single sheet of Saran plastic wrap (not cling wrap!) and sprinkle a pinch of salt into the plastic wrap.
- Add about ½ cup cooked rice, still warm, to the plastic wrap-lined bowl. Add another pinch of salt to the rice.
- Pull the edges of the plastic together and tighten them, squeezing as much air out of the rice as you can and making sure it’s tightly wrapped.
- Use the palm of your hands to form the rice ball wrapped in plastic wrap into a triangle shape.
- Open the plastic wrap and gently remove your onigiri.
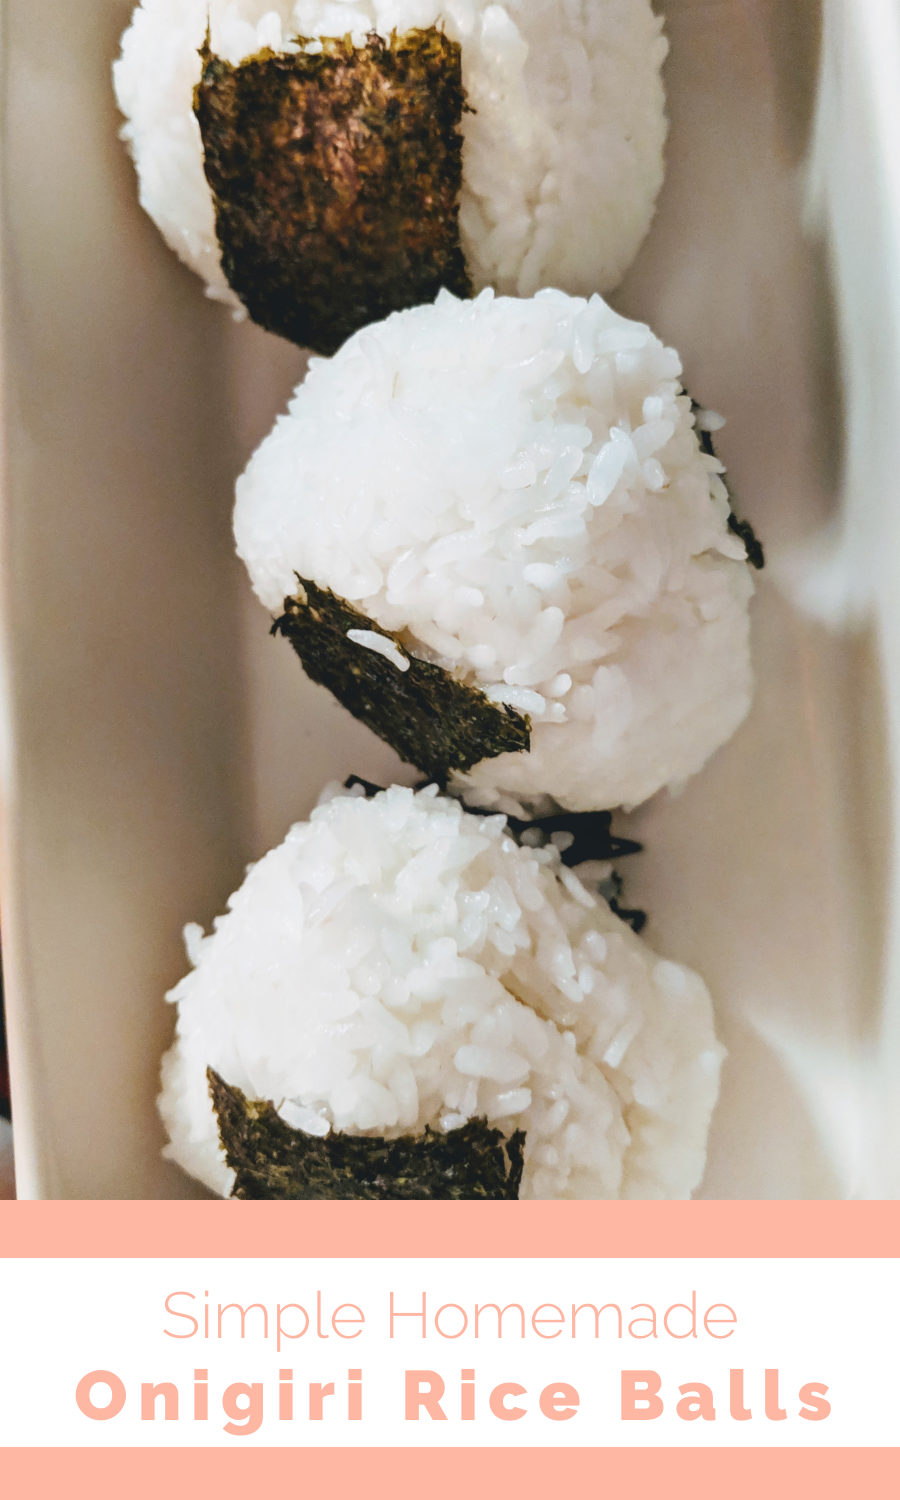
- Repeat until you have used all of your rice. Garnish with nori and/or furikake and enjoy!
This recipe does not keep well in the fridge overnight but can last for most of a day unrefrigerated and wrapped in plastic!
I wish I had taken pictures of the assembly process so it makes a little more sense, but if I make this again I will be sure to remember!


Simple Homemade Onigiri Rice Balls
Ingredients
- 1 cup Japanese short grain rice
- 1 ¼ cup water
- 1 tsp salt divided
- Nori to garnish
- Furikake to garnish (optional)
Instructions
Rice Preparation Directions:
- Thoroughly wash your rice. You can either put it in a strainer and run it under the faucet, stirring with your hands until the water underneath runs clear, or put it in a large mixing bowl with tap water, stir with your hands, dump the water and repeat five or six times. (I’ve tried both, they both work fine.)
- Once clean, transfer your rice to a large mixing bowl and fill it with more water. Let the rice soak in the water for at least 30 minutes.
- Transfer rice to a fine mesh strainer to drain the water and let it sit in the strainer for at least 15 minutes to dry the rice grains.
- Transfer rice to a large pot and add 1 ¼ cups water.
- Cover and heat on medium-high heat. Only lift the lid quickly after about 5 minutes to see if the water is boiling, but otherwise DO NOT LIFT THE LID.
- Once the water is boiling, lower the temperature to low and cook covered for about 15 minutes. Remember, DO NOT LIFT THE LID. We want as much steam as possible trapped inside!
- Remove pot from heat and set aside to rest for at least 10 more minutes, and once again… DO NOT LIFT THE LID!
- Once it’s finished resting, now you may open the lid and fluff your rice!
Onigiri Directions:
- Line a small bowl with a single sheet of Saran plastic wrap (not cling wrap!) and sprinkle a pinch of salt into the plastic wrap.
- Add about ½ cup cooked rice, still warm, to the plastic wrap-lined bowl. Add another pinch of salt to the rice.
- Pull the edges of the plastic together and tighten them, squeezing as much air out of the rice as you can and making sure it’s tightly wrapped.
- Use the palm of your hands to form the rice ball wrapped in plastic wrap into a triangle shape.
- Open the plastic wrap and gently remove your onigiri.
- Repeat until you have used all of your rice. Garnish with nori and/or furikake and enjoy!


1 comment