The post Loaded Breakfast Toast appeared first on I Forgot Salt!.
]]>
Although I’ve posted some avocado toast recipes before, this absolute monster of a breakfast toast carried me through my last semester of 2020. What a year–I can’t believe it’s almost over. We’re nearly free from this absolute catastrophe! It’s hard to fathom that another year has come and gone, while at the same time I feel like I’ve aged a decade since January. I’m sure the feeling is mutual. Despite the chaos, however, I feel like 2020 has been one of my most productive and accomplished years in quite a while, even with what seems like the end of the world constantly looming on the horizon.
As I’ve mentioned in previous posts, Alex and I made some very radical changes in our lives, from larger things changing jobs (him) to entering university (me) to moving even farther south (both of us) to smaller, more individual improvements like switching to a plant-based diet (me), taking up running (him), and making a conscious effort to read more books (both of us). In the grand scheme of things–even our lowest points–I think we have come out of 2020 as better, stronger people.
That doesn’t mean this year wasn’t difficult, however. Our lowest points were indeed low, but I think we’re lucky enough to be able to dwell on not on the negatives but on the positives of 2020 in retrospective. While we will be looking back on this year as a true dumpster fire, I want to try not to forget about the good things that happened in spite of so much strife. I am tentatively putting some of my hopes in 2021, but will be satisfied as long as we make it through intact.
Now, onto a lighter note and the actual breakfast toast recipe…

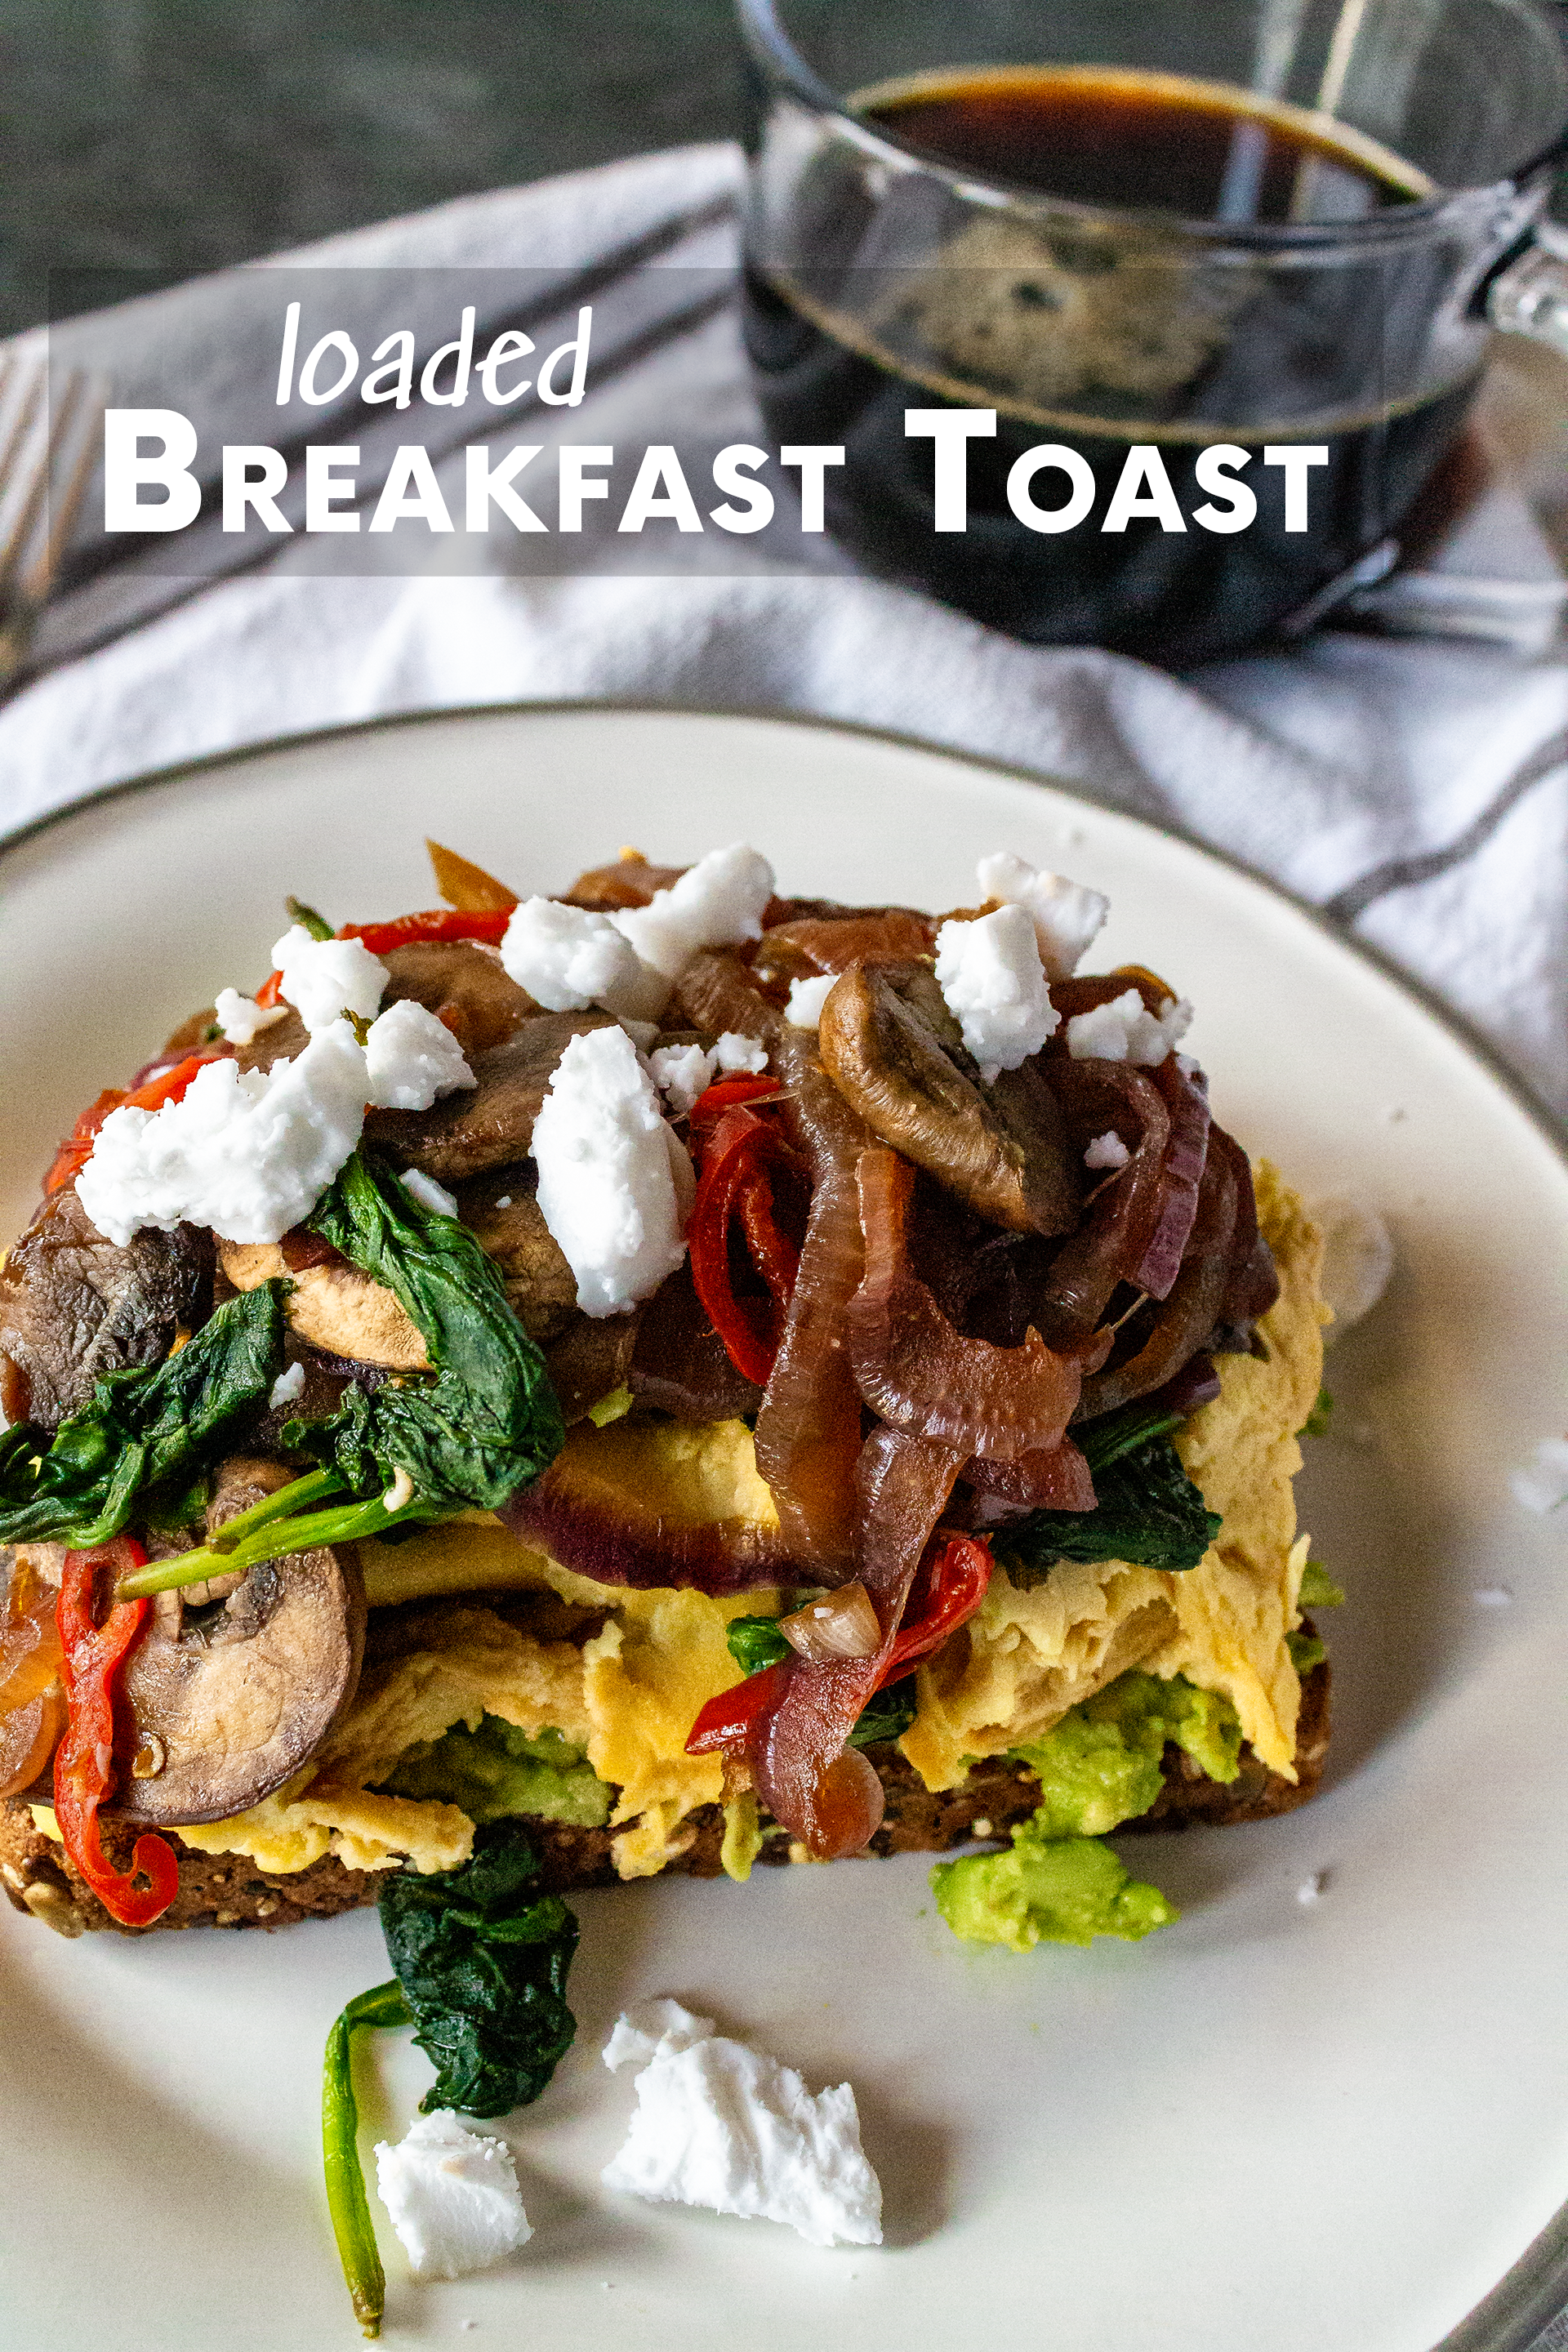
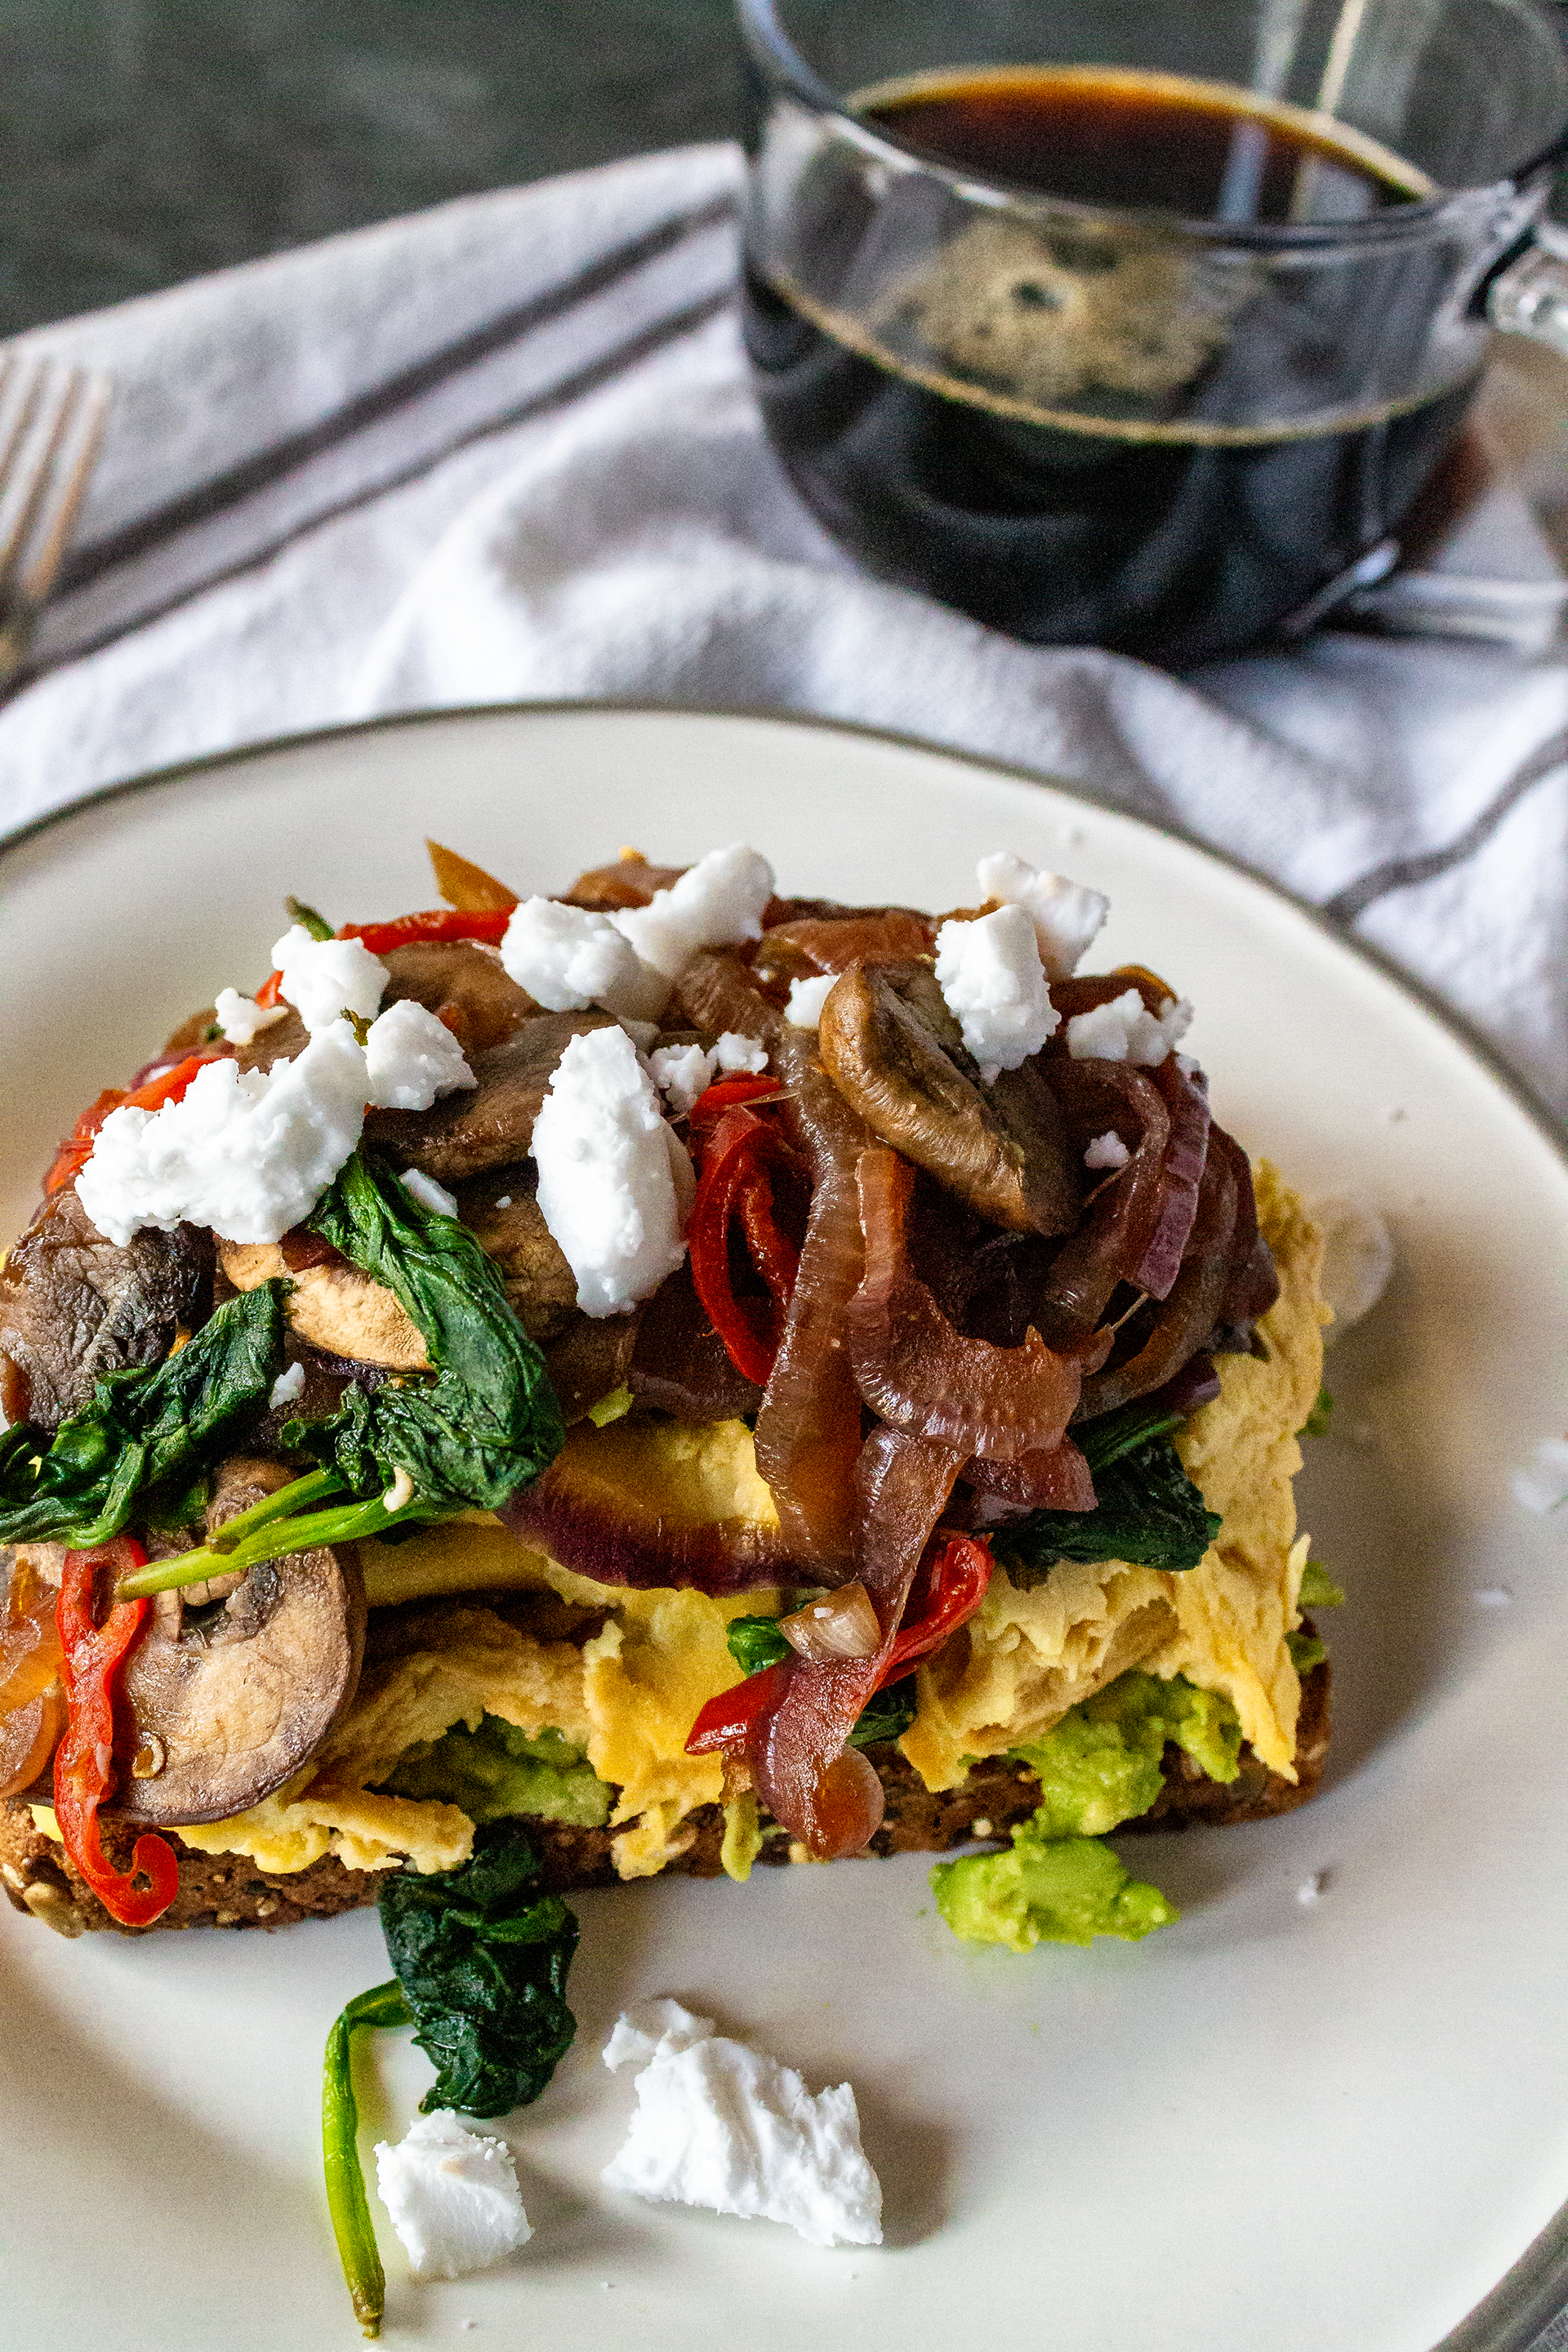
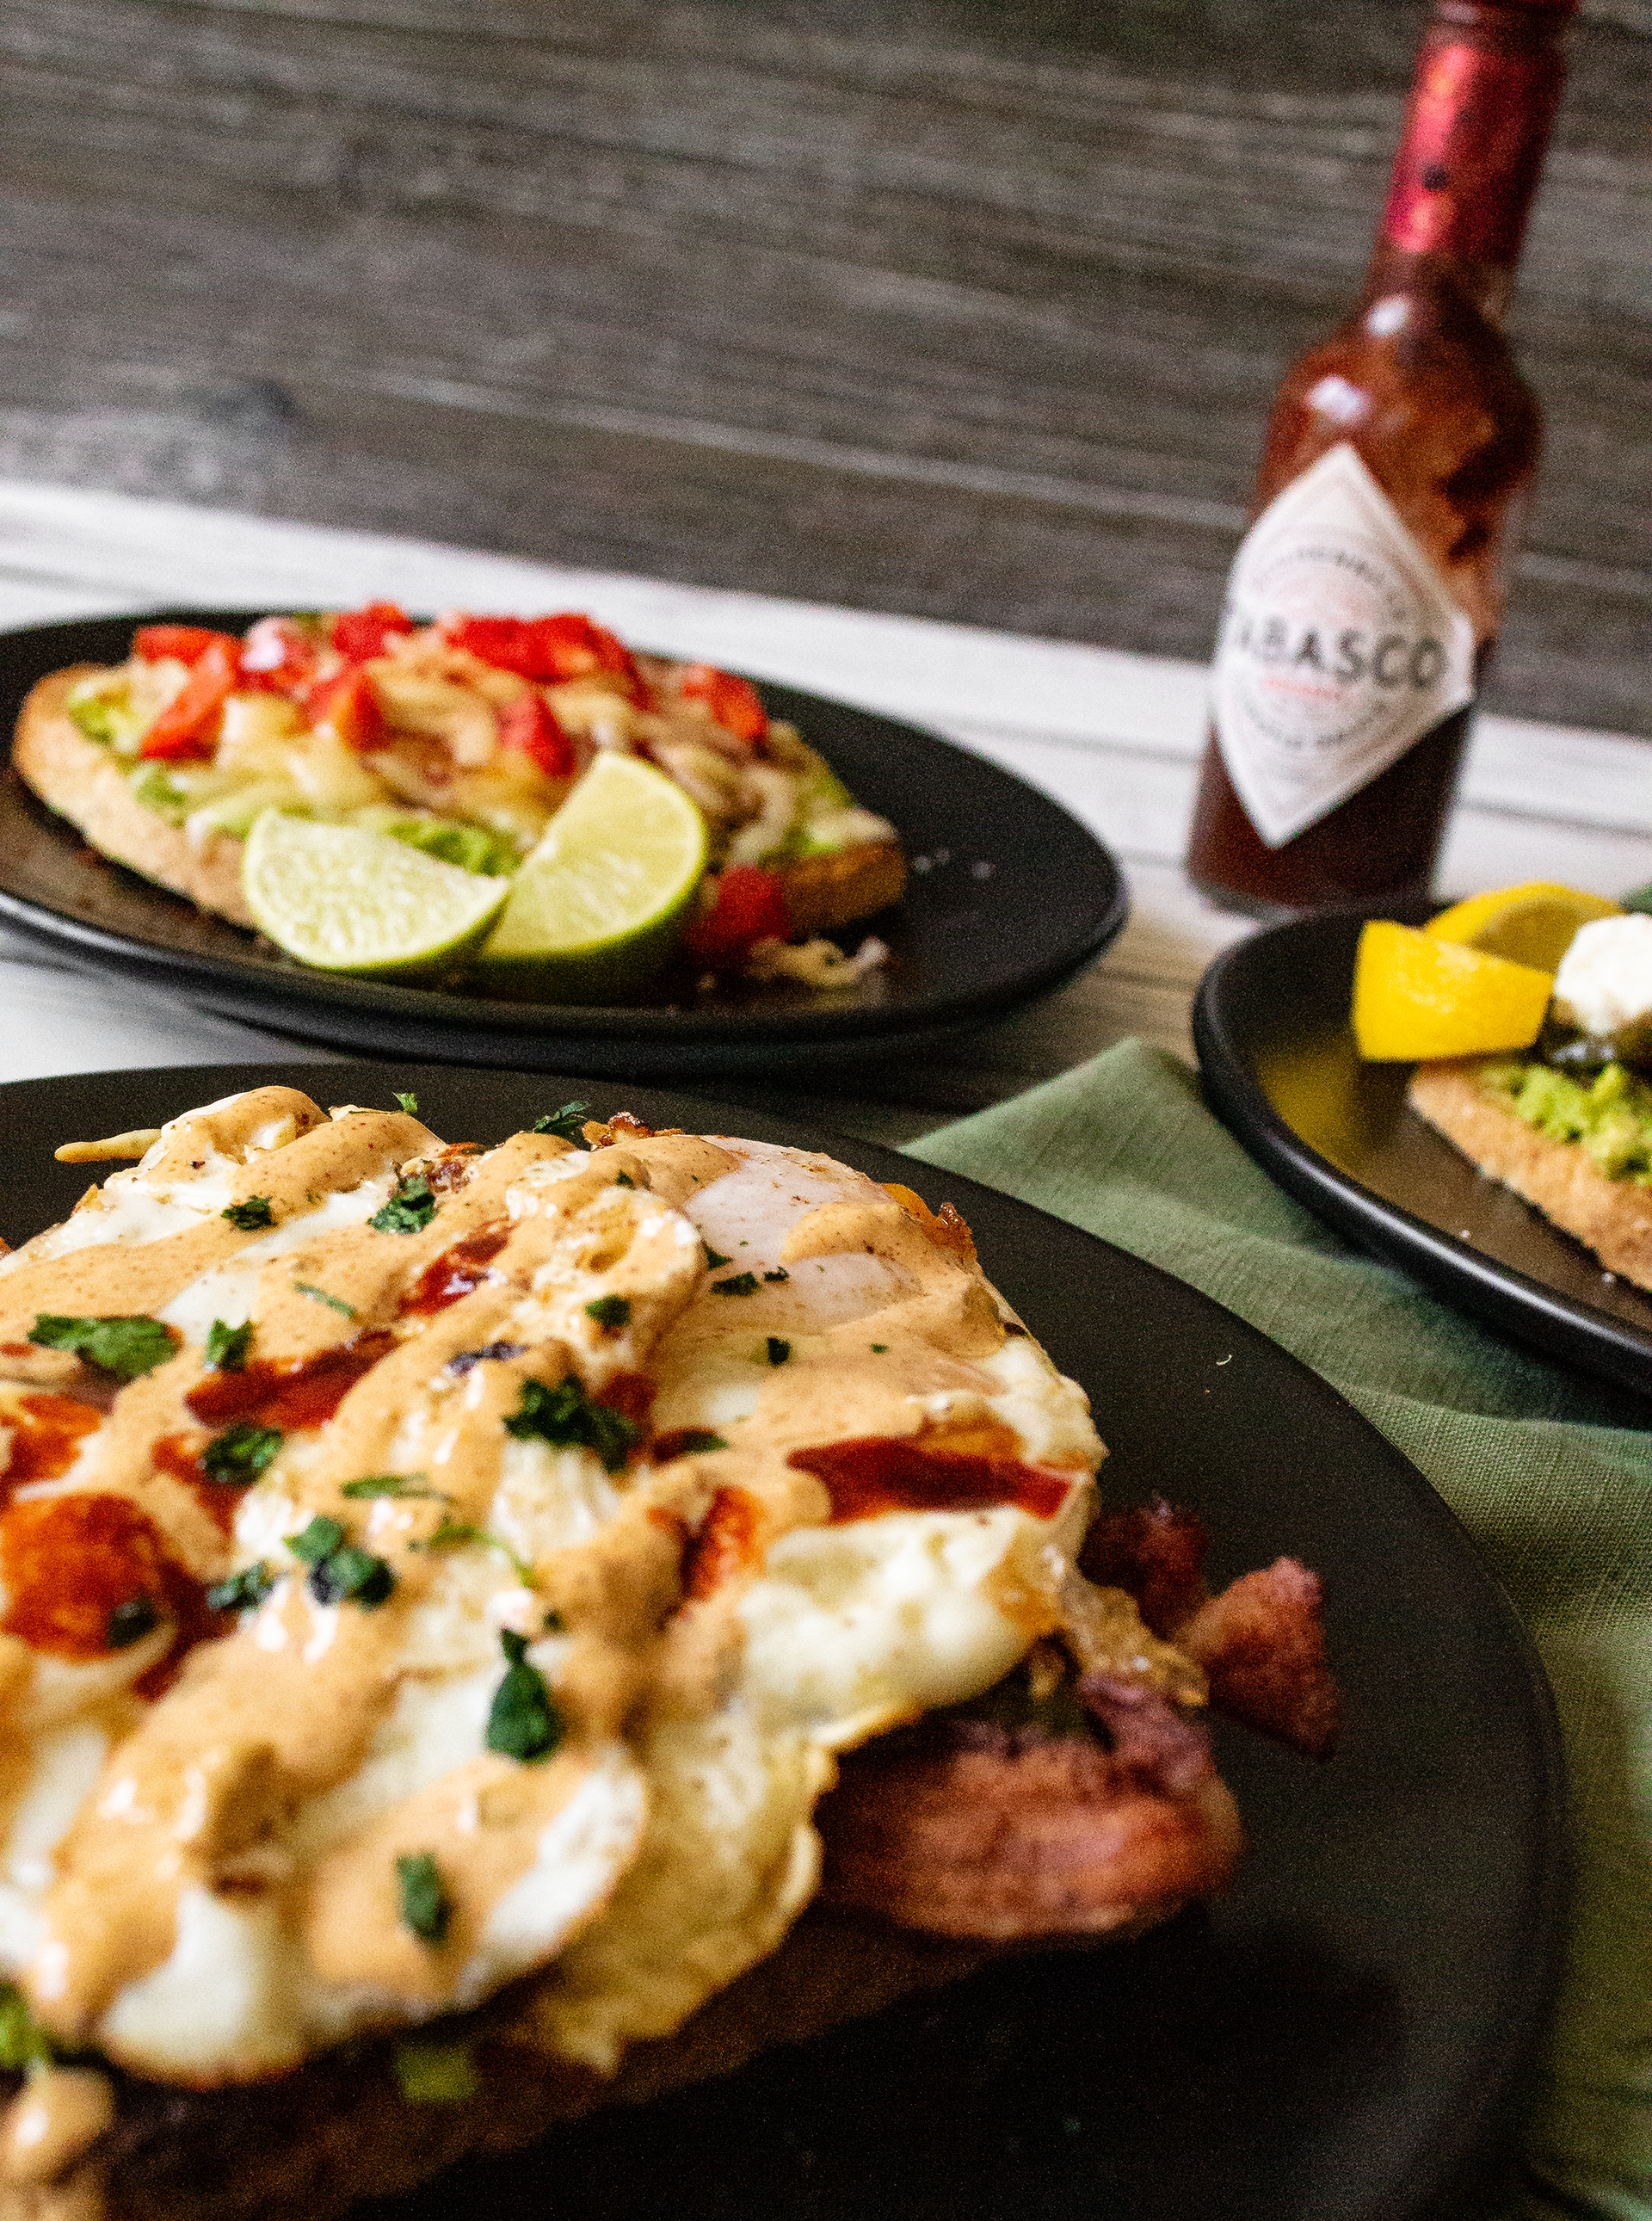
It is absolutely no secret that I love avocado toast, and this loaded “breakfast toast” version has become my go-to for a late morning meal or brunch if I need something to get me through an afternoon of online classes. The salty-sourness of the soy sauce and balsamic vinegar compliments the relatively sweet feta cheese so well. All of that veggie goodness layered atop protein-packed eggs/egg substitute (like JUST Egg or my tofu scramble) and an avocado chock full of healthy fats makes for a wonderfully nourishing start to the day. Structurally, I’ve found that whole grain or hearty sourdough bread holds up best under all of the weight, but white bread makes for an indulgent and delicious alternative as well. This recipe is so versatile, you can change almost any element and it will still taste great! Also, as an aside–yes, this can be made completely vegan. I’ve recently discovered Violife’s feta alternative (pictured) and I’m obsessed.
Ingredients:
- 2 slices toast, buttered
- 1 cup scrambled eggs, egg substitute, or tofu scramble
- 1/4 cup feta cheese
- 1 avocado
- 1/2 cup baby bella mushrooms, sliced
- 1/2 cup onion, sliced
- 1/4 cup mini sweet peppers, sliced
- 1 cup spinach
- 2 tsp soy sauce
- 1 tsp balsamic vinegar
- 1/2 tsp lemon juice
- 1/4 tsp salt
- 1/4 tsp black pepper
Directions:
- Toast two slices of bread in a pan with butter, under the broiler, or in a toaster. Set aside.
- Mash 1 fresh avocado in a small bowl with salt, pepper, and lemon juice. Set aside.
- Prep and cook scrambled eggs, egg substitute, or tofu scramble as desired. Set aside.
- Heat a nonstick pan on medium-high heat. Add peppers and sauté for 1-2 minutes, or until softened and fragrant.
- Add mushrooms, onion, soy sauce, and balsamic vinegar and cook for an additional 3-5 minutes, or until vegetables have browned and most liquid has evaporated.
- Add spinach and sauté for about 1 minute, or until wilted. Set aside to assemble.
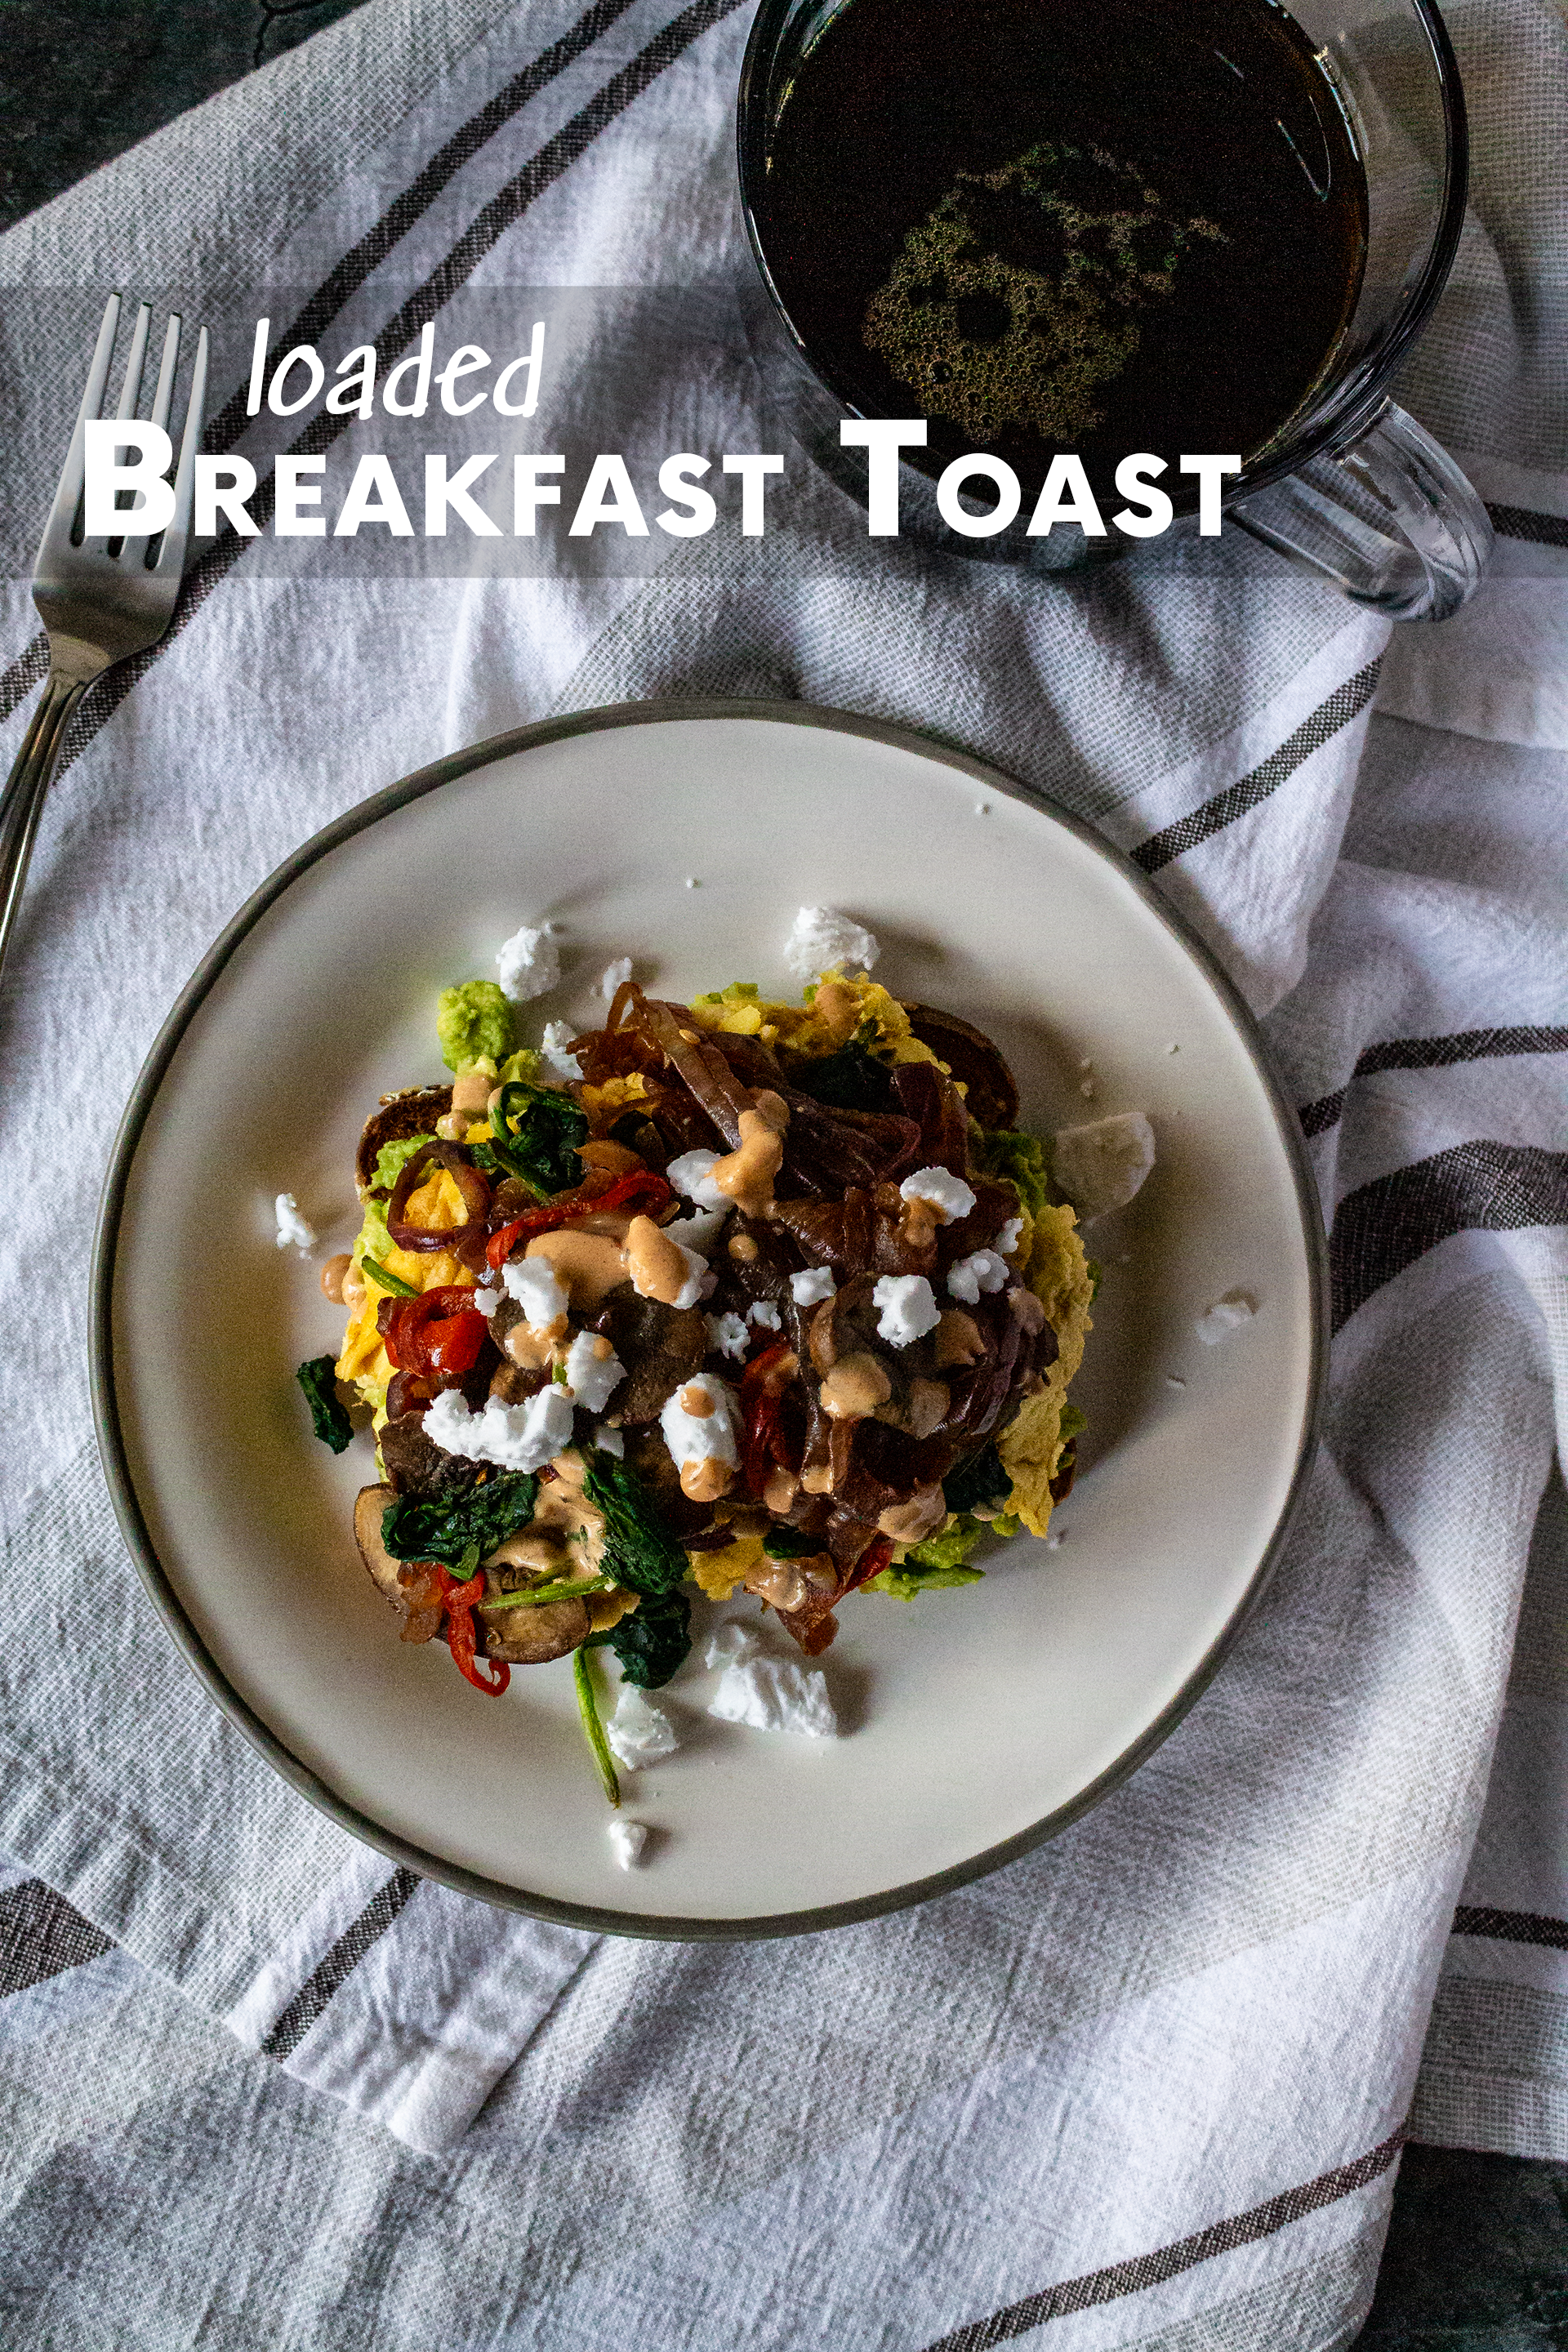
- Layer toast with avocado, egg/egg substitute, vegetable sauté, feta cheese, and your favorite hot sauce or crema.
Although I wouldn’t recommend storing an assembled toast in the fridge for fear of the bread becoming irreparably soggy, the individual components keep really well on their own. The lemon juice keeps the avocado from becoming brown, and the vegetable sauté can last several days and still taste great. More than once I’ve overestimated how much I want to eat in a single sitting and saved the toppings for another day.

Loaded Breakfast Toast
Ingredients
- 2 slices toast buttered
- 1 cup scrambled eggs egg substitute, or tofu scramble
- 1/4 cup feta cheese
- 1 avocado
- 1/2 cup baby bella mushrooms sliced
- 1/2 cup onion sliced
- 1/4 cup mini sweet peppers sliced
- 1 cup spinach
- 2 tsp soy sauce
- 1 tsp balsamic vinegar
- 1/2 tsp lemon juice
- 1/4 tsp salt
- 1/4 tsp black pepper
Instructions
- Toast two slices of bread in a pan with butter, under the broiler, or in a toaster. Set aside.
- Mash 1 fresh avocado in a small bowl with salt, pepper, and lemon juice. Set aside.
- Prep and cook scrambled eggs, egg substitute, or tofu scramble as desired. Set aside.
- Heat a nonstick pan on medium-high heat. Add peppers and sauté for 1-2 minutes, or until softened and fragrant.
- Add mushrooms, onion, soy sauce, and balsamic vinegar and cook for an additional 3-5 minutes, or until vegetables have browned and most liquid has evaporated.
- Add spinach and sauté for about 1 minute, or until wilted. Set aside to assemble
- .Layer toast with avocado, egg/egg substitute, vegetable sauté, feta cheese, and your favorite hot sauce or crema.

The post Loaded Breakfast Toast appeared first on I Forgot Salt!.
]]>The post Avocado Toast Three Ways appeared first on I Forgot Salt!.
]]>
Like any good, self-respecting millennial, I am obsessed with avocado toast. After figuring out the trick to keeping avocados fresh for a few weeks at a time (the fridge, you fool!), I took it upon myself to end every Wegman’s trip with enough unripe organic avocados to shame even the most dedicated of Portland hipsters. What can I say? I’m a woman of taste, and that taste revolves almost entirely around mushy green superfoods. Breakfast, brunch, lunch, dinner, or a midnight snack–if there’s a slice of bread and half of one of Mexico’s greatest agriculture contributions to the modern world rolling around in plastic wrap (I know, not the most environmentally friendly; I really need to get some of that cool beeswax paper), I’ll have my hands on a slice of avo-toast the minute hunger hits.
One of the best things about avocado toast–like all bread-based, sandwich-adjacent foods–is its unending versatility. You can literally open your fridge or pantry, stack whatever you find onto the bread/butter/avocado base, and end up with something absolutely delicious. Over the course of my whirlwind romance with The Reason Millennials Can’t Afford to Buy Homes (Fox New’s finest piece of journalism to date, for sure), I’ve indulged in everything from The Basic Bitch (simple salt and pepper, maybe a bit of lemon juice) to God’s Greatest Mistake (leftover Chinese take-out on sourdough, smothered in a runny fried egg), and every iteration I’ve devoured has been undeniably delicious. Just before sitting down to type this out, even, I took a break to feast on two slices of my current favorite combination, I Wouldn’t Put Effort Into This Even If You Paid Me (feta cheese and chipotle mayo, a bit of lime juice if I’m really feeling zesty) just to set the mood.
Truly, avocado toast has come to define the American millennial generation more than any other cultural touchstone in the last fifteen years. More controversial than Britney Spears, more despised than Twilight, more universal than the iPhone, and more uniting than the PSL (seriously–everyone loves those things), it is the stuff of legends. Every decade has a defining moment, a cornerstone that lingers beyond the test of time to become some immortal thing still playing an active role in people’s lives today, so many years after its heyday. The 1960s had The Beatles, the 1970s had high-waisted jeans, the 1980s had Super Mario Bros, the 1990s had Friends, and the early 2000’s had The Greatest American Financial Crisis Since World War II. And I believe the 2010s will be remembered for one thing and one thing alone: our Lord and Savior, avocado toast.
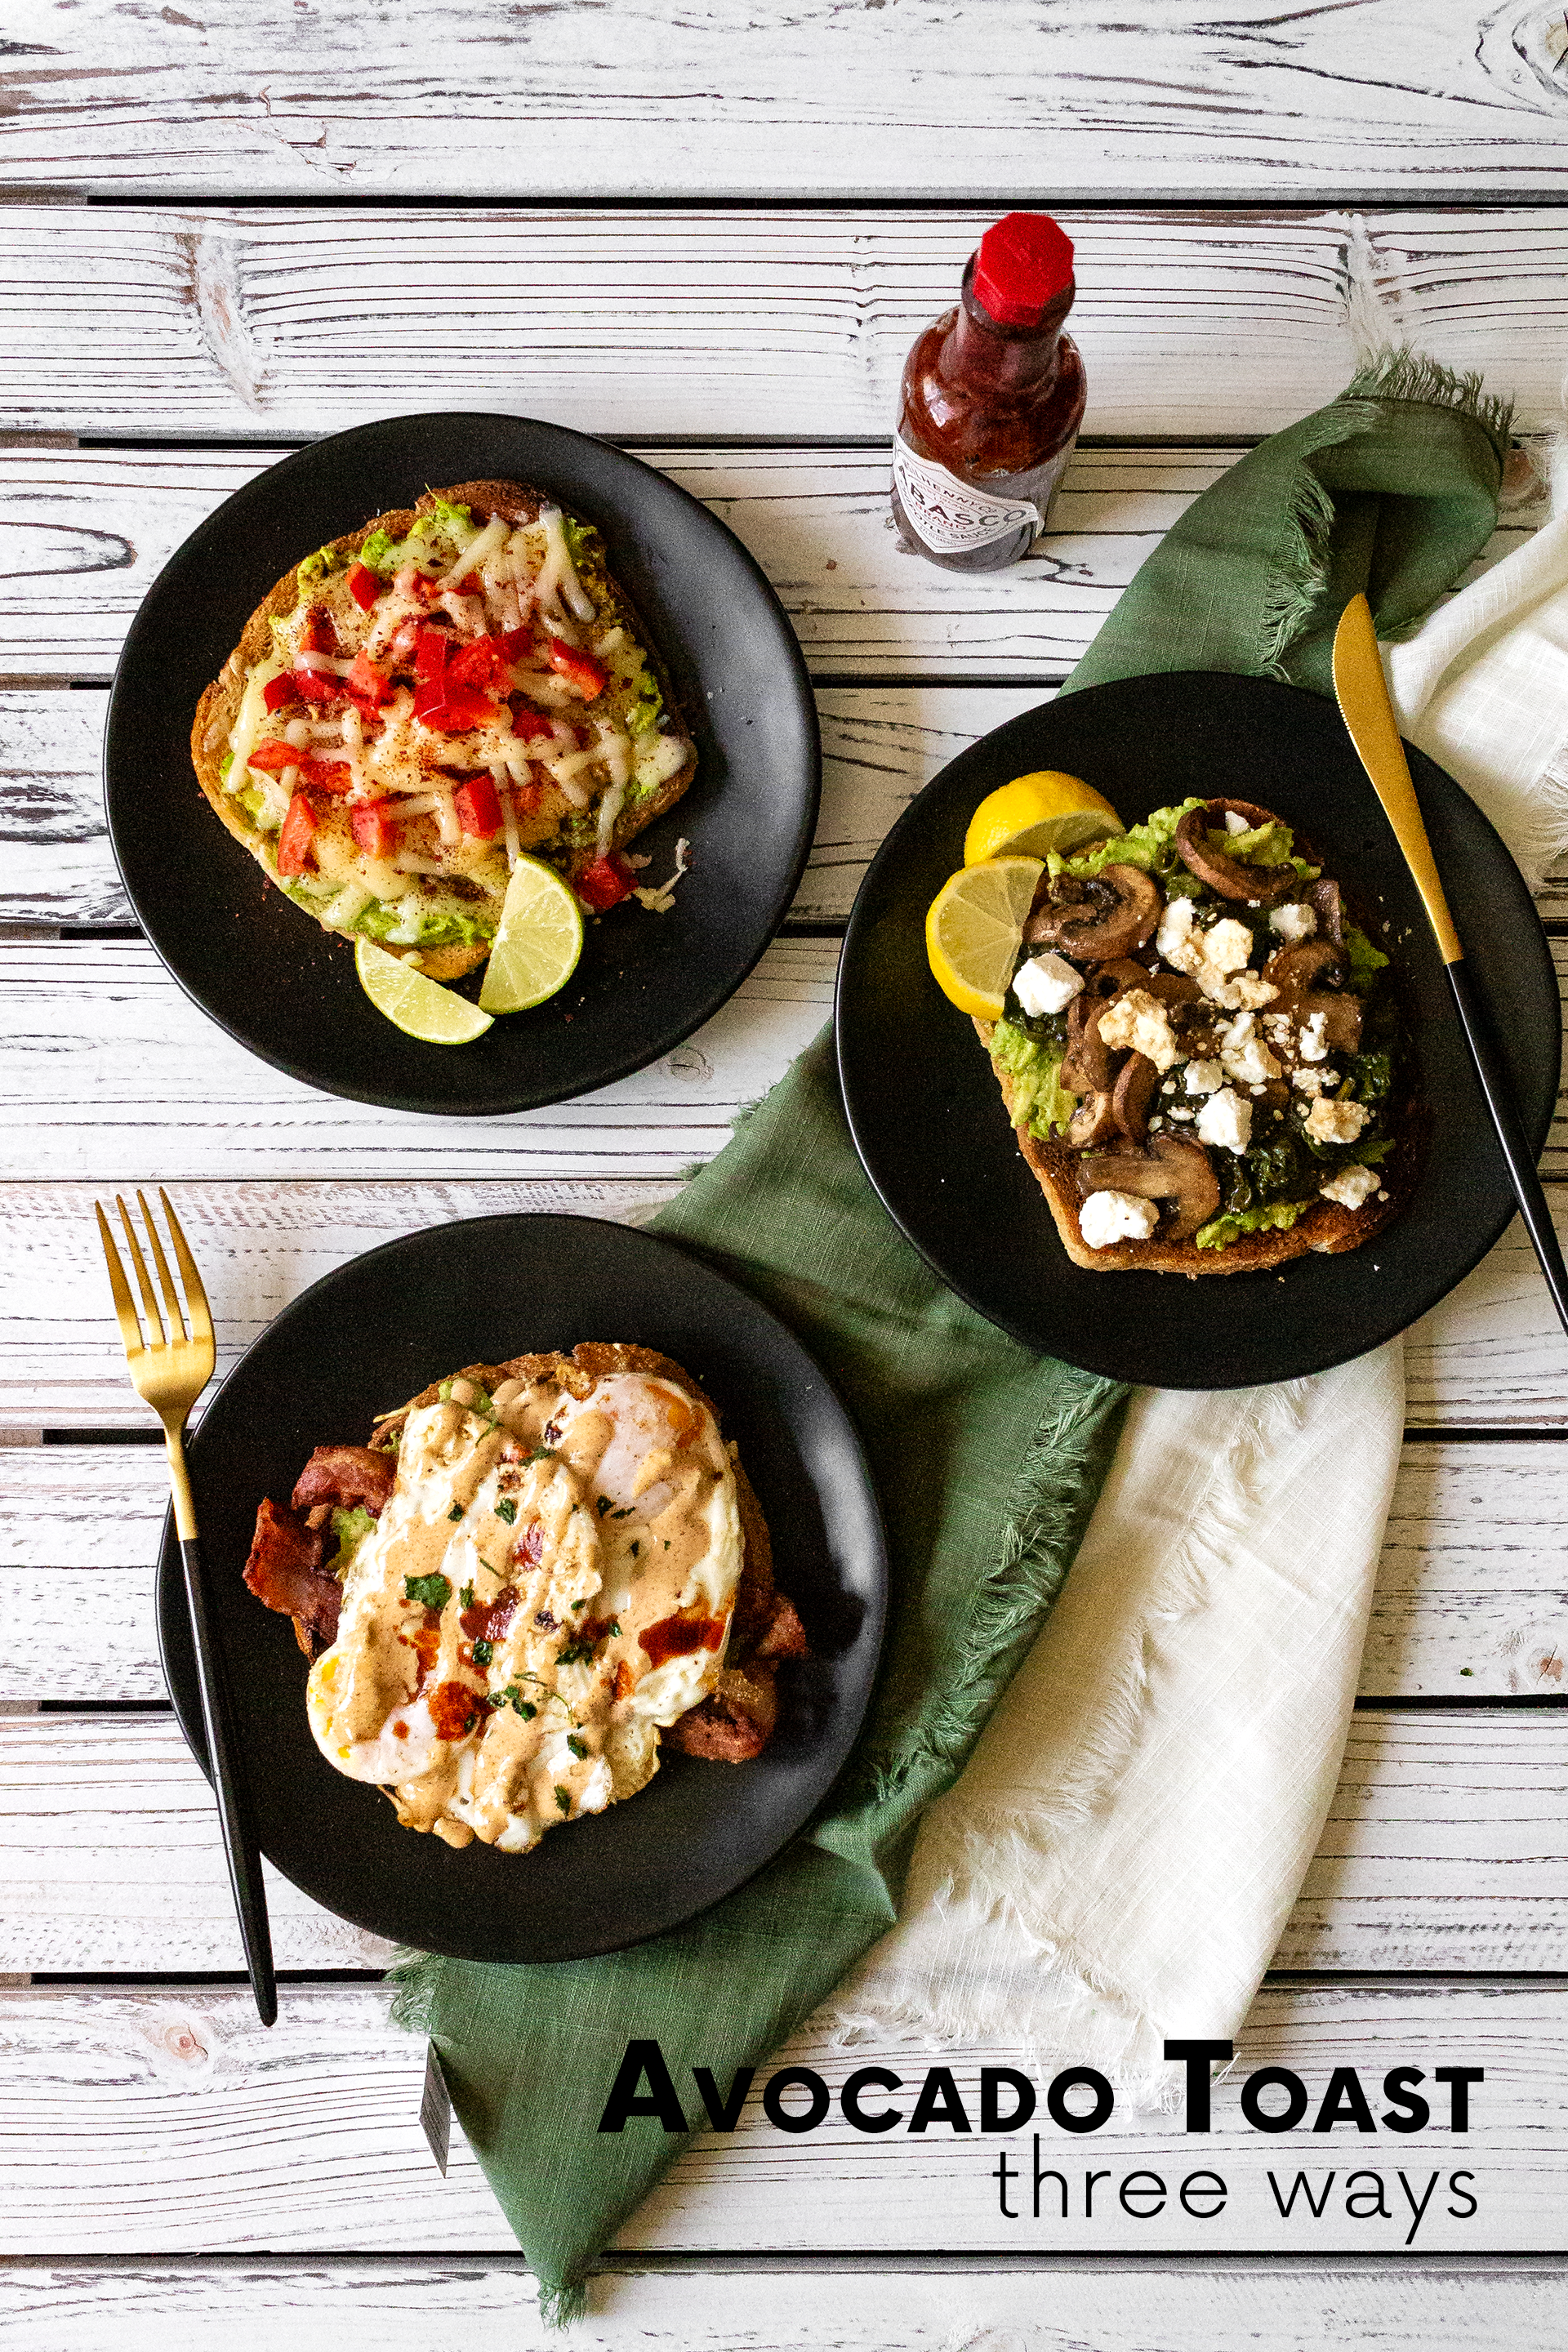
So, without further ado, I present three easy and delicious versions of this most blessed dish: I’m Only Dedicating Ten Minutes To My Lunch, Just A Little Bit Pretentious, and The Hangover: Part IV.
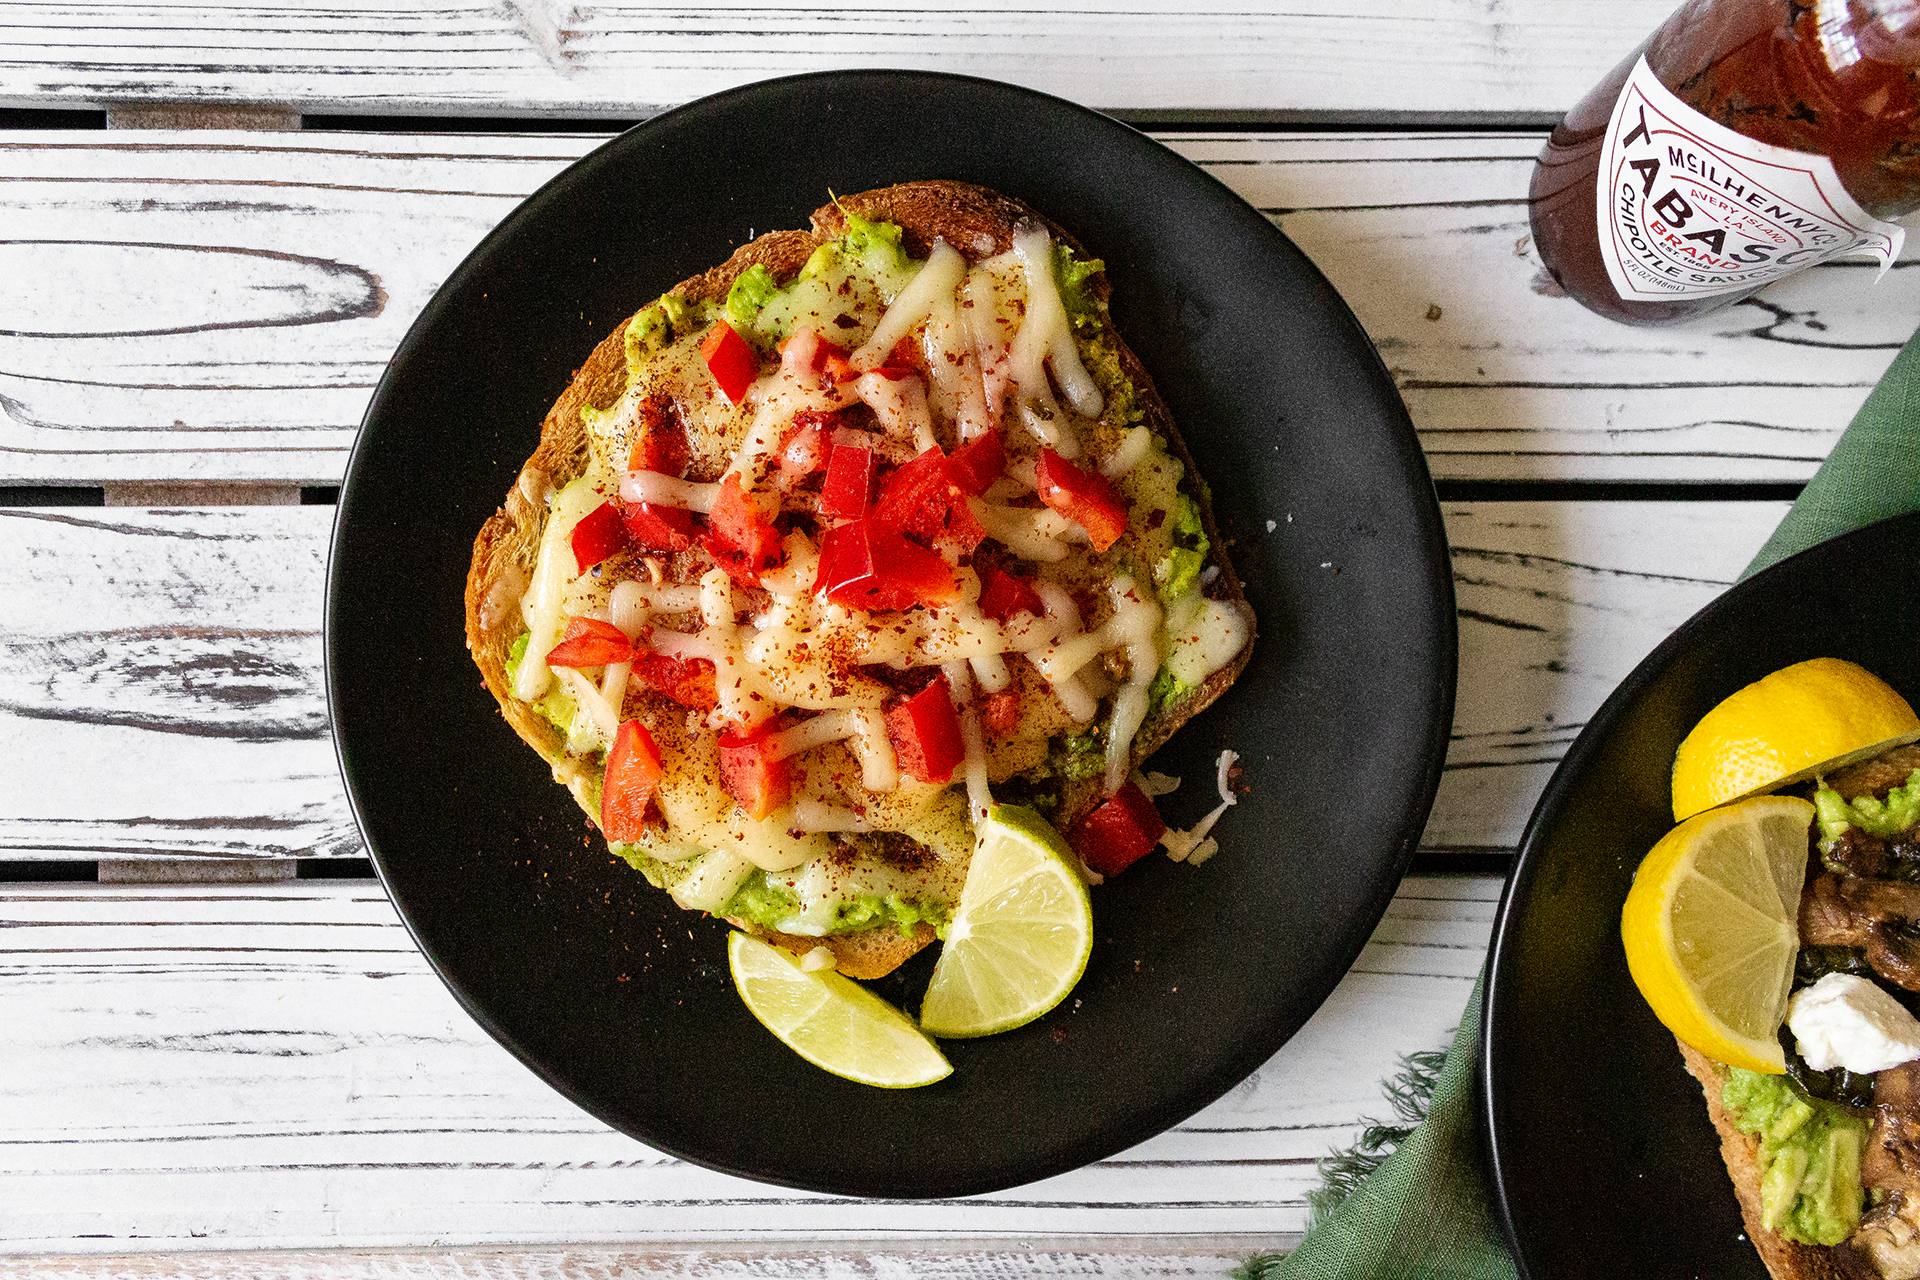
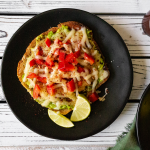
I’m Only Dedicating Ten Minutes To My Lunch
Ingredients:
- 1 slice bread
- butter (to toast)
- 1/2 ripe avocado
- 1/3 cup shredded pepperjack cheese
- 1/4 cup diced red bell pepper
- 1/2 tsp chili powder
- lime juice (to taste)
Directions:
- In a small bowl, thoroughly mash 1/2 ripe avocado.
- Generously coat one side of the bread slice with butter. Place on a nonstick baking sheet and broil on LOW for 3-5 minutes, or until golden brown.
- Remove from oven, flip, and spread avocado on the soft/untoasted side of the bread.
- Top with cheese, bell pepper, and chili powder. Return to oven and broil on LOW for additional 2-4 minutes, or until cheese has melted.
- Garnish with lime juice and enjoy while warm.
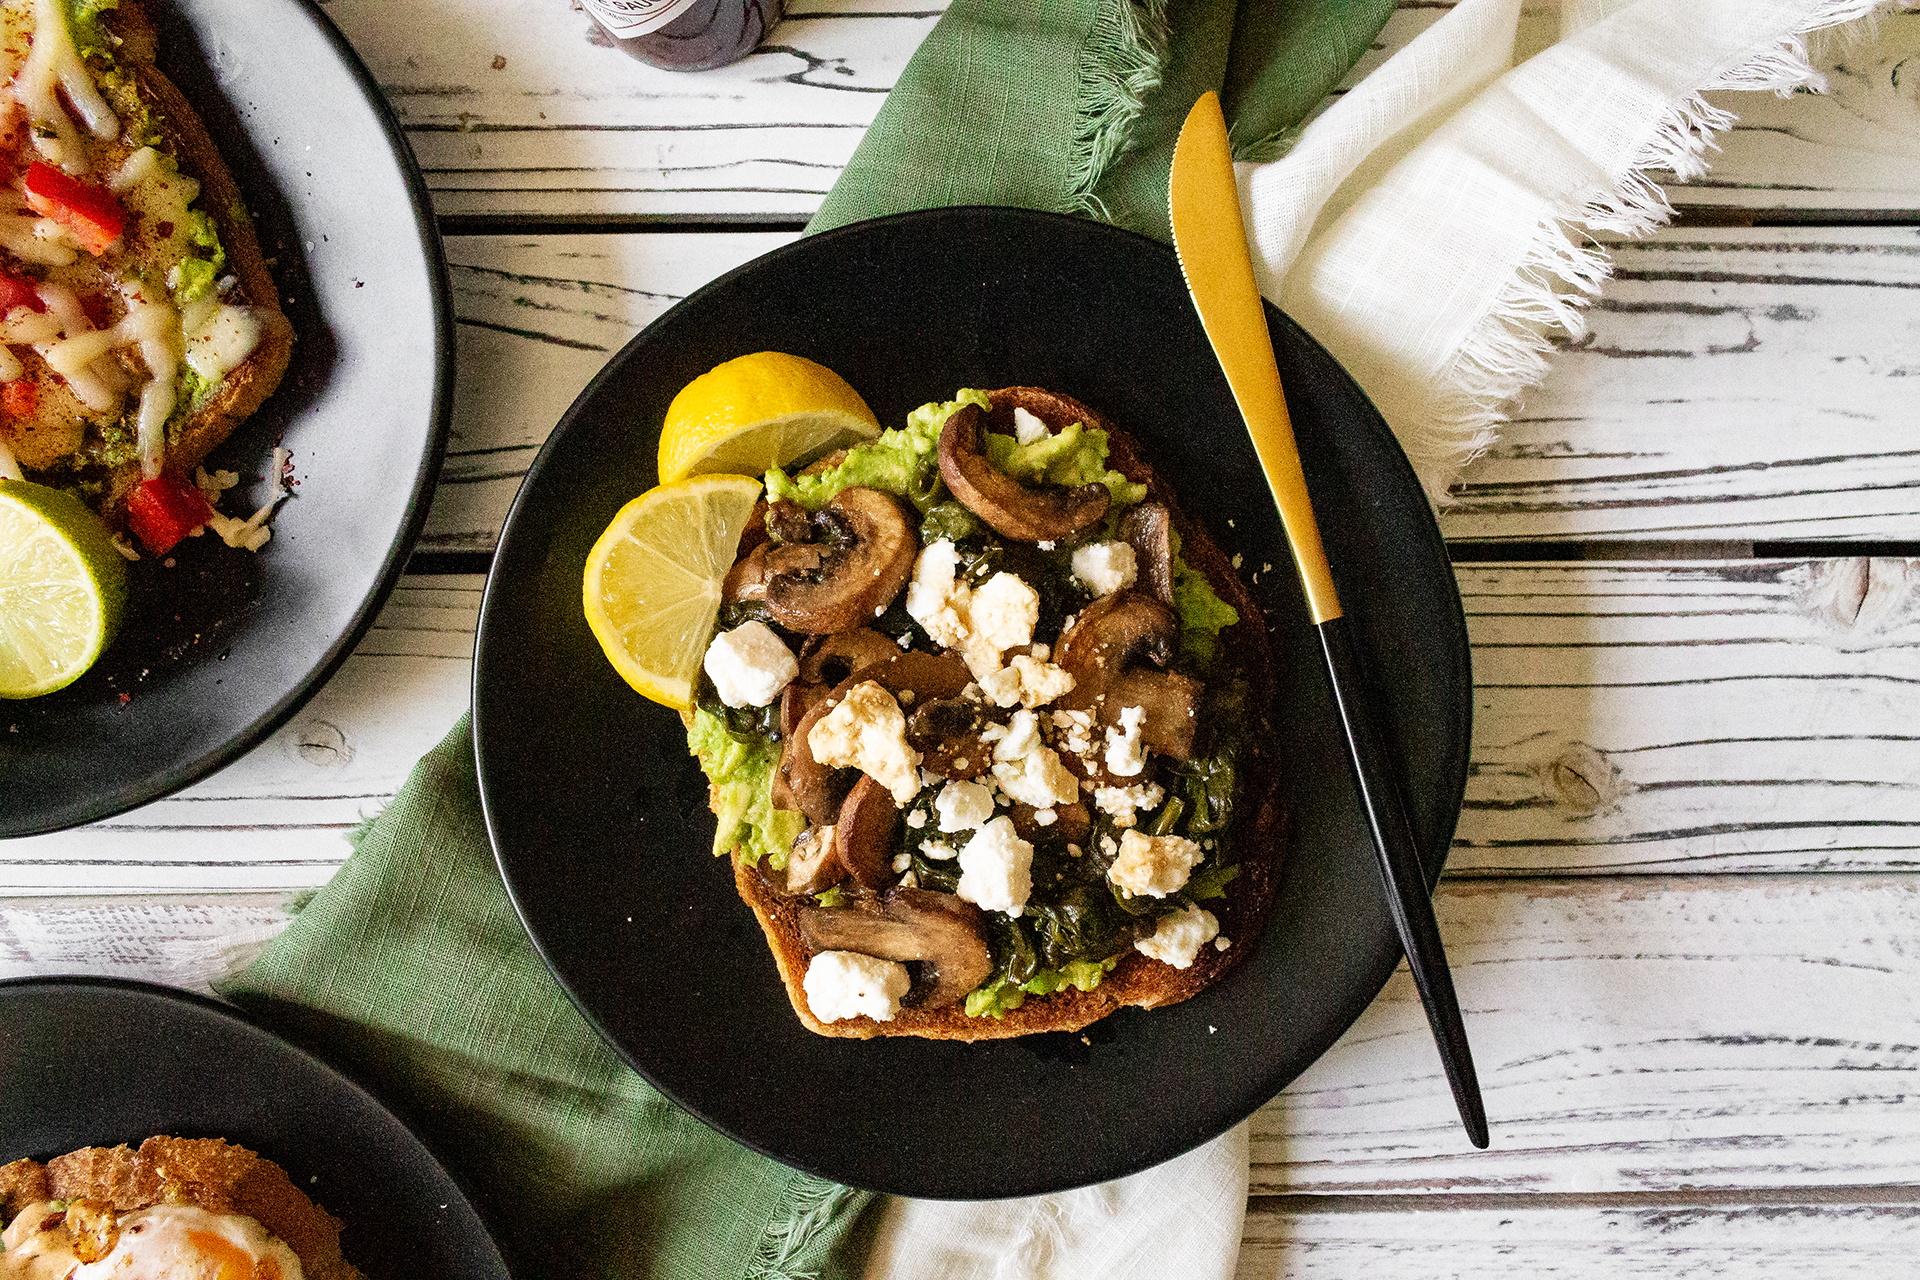
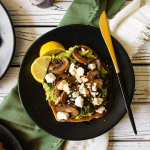
Just A Little Bit Pretentious
Ingredients:
- 1 slice bread
- butter (to toast)
- 1/2 ripe avocado
- 1/2 cup raw, fresh spinach
- 1/3 cup sliced mushrooms
- 1/4 cup feta cheese
- 2-3 tbsp balsamic vinegar
- salt (to taste)
- black pepper (to taste)
- lemon juice (to taste)
Directions:
- In a nonstick skillet heated to medium-high, add mushrooms, spinach, balsamic vinegar, salt, and black pepper. Pan fry for 5-7 minutes, or until spinach has wilted and mushrooms have browned. Set aside.
- In a small bowl, thoroughly mash 1/2 ripe avocado.
- Generously coat one side of the bread slice with butter. Place on a nonstick baking sheet and broil on LOW for 3-5 minutes, or until golden brown.
- Remove from oven, flip, and spread avocado on the soft/untoasted side of the bread.
- Top with sauteed mushrooms/spinach, feta cheese, and lime juice. Can be enjoyed either warm or room-temperature.

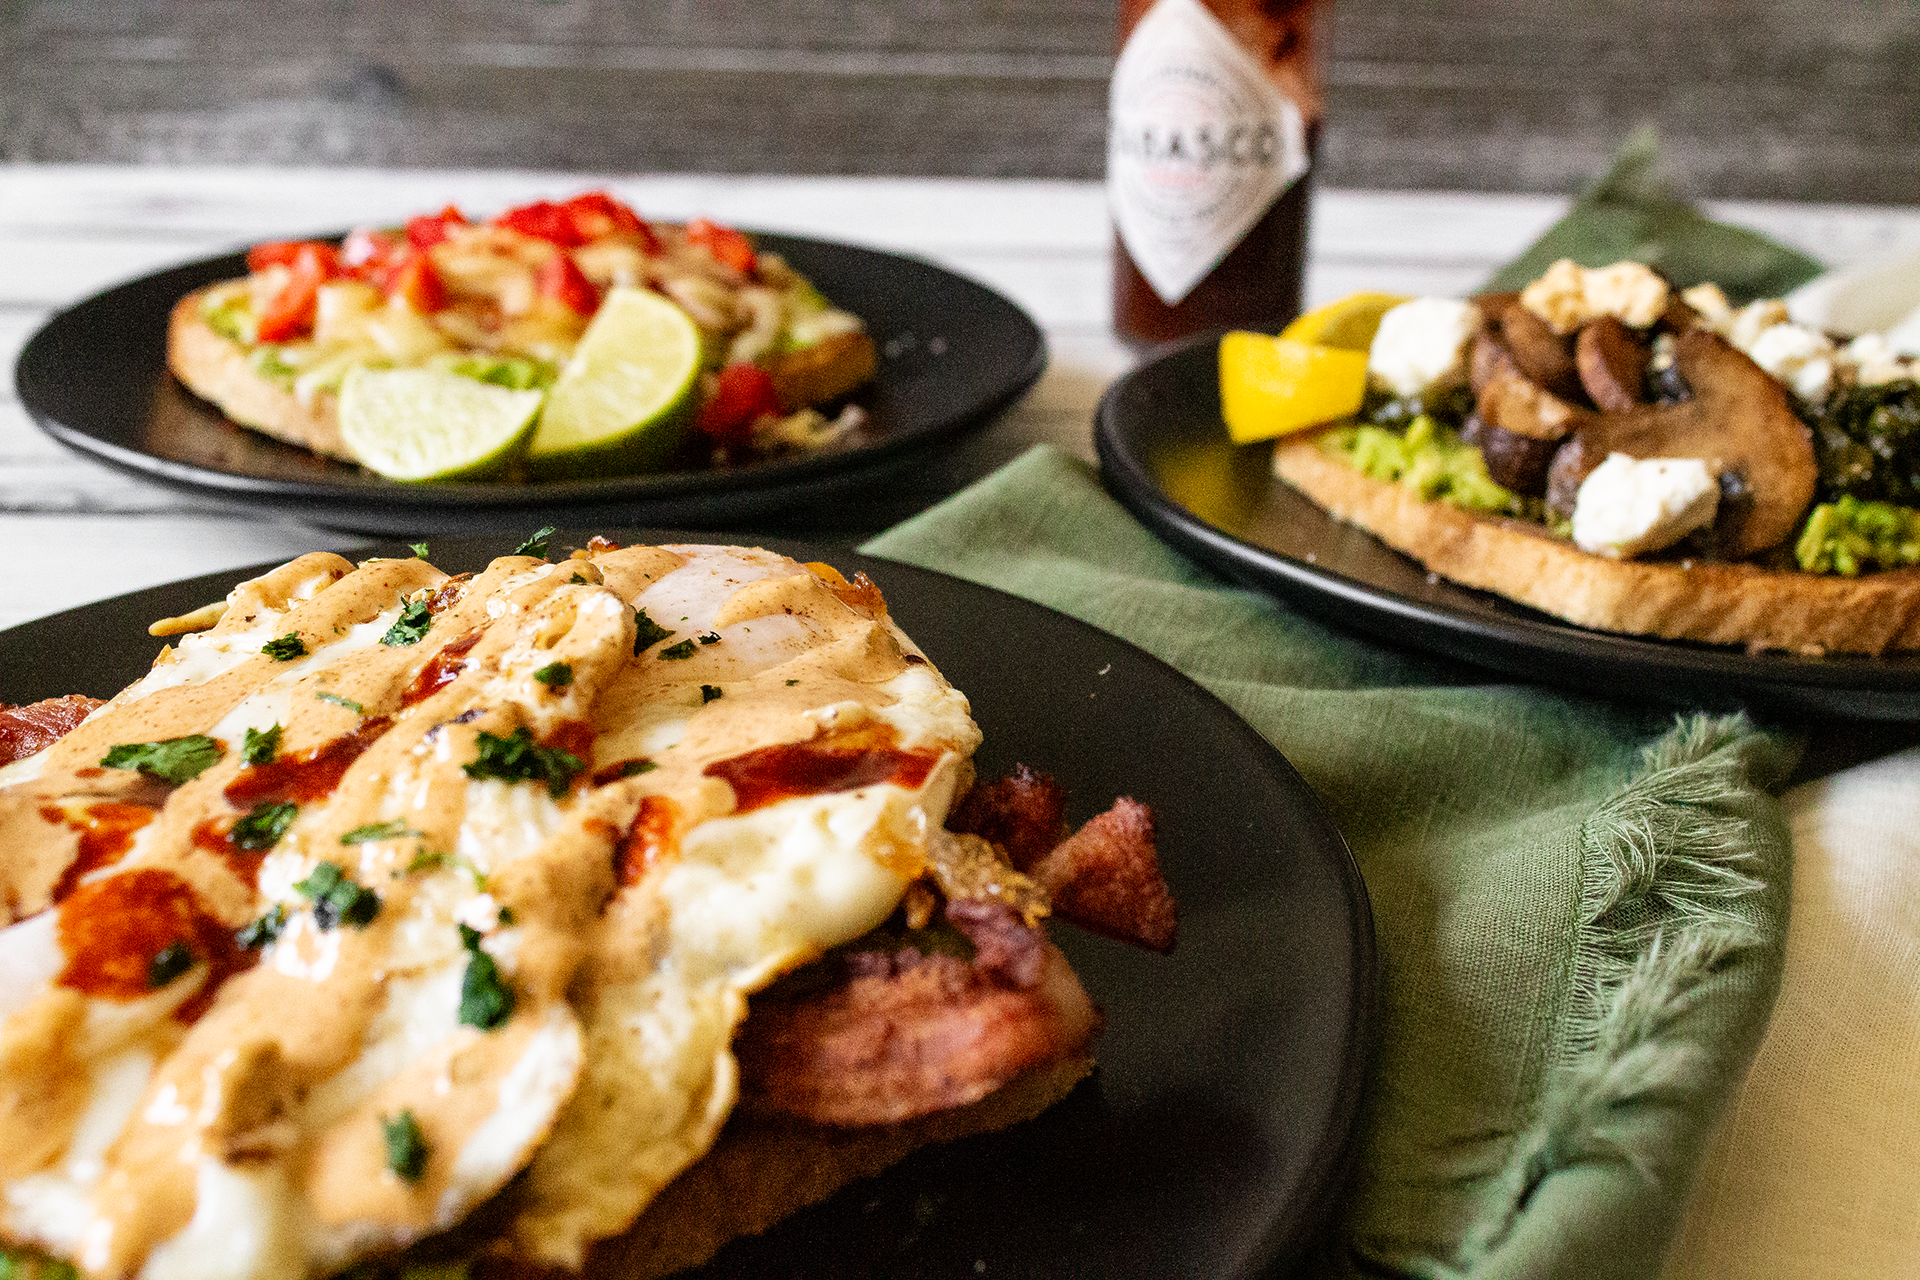
The Hangover: Part IV
Ingredients:
- 1 slice bread
- butter (to toast)
- 1/2 ripe avocado
- 2-3 slices raw, thick-cut bacon
- 2 large eggs
- 2 tbsp chipotle mayo
- 1 tsp chipotle Tabasco sauce
- 1/2 tsp cilantro
Directions:
- In a large nonstick skillet, pan fry 2-3 slices thick-cut bacon until crispy.
- Without removing any rendered bacon fat from the pan (no matter how much is left; Kirkland Signature usually yields about 1/4 cup per 5 slices of bacon), crack one egg directly into the hot pan and position so that the how oil pools across the top of the whites. Fry until bubbling and crispy on the bottom, then repeat with the second egg.
- Meanwhile, in a small bowl, thoroughly mash 1/2 ripe avocado.
- Generously coat one side of the bread slice with butter. Place on a nonstick baking sheet and broil on LOW for 3-5 minutes, or until golden brown.
- Remove from oven, flip, and spread avocado on the soft/untoasted side of the bread.
- Top with bacon, fried eggs, chipotle mayo, hot sauce, and cilantro. Serve immediately, while eggs are still hot. (Best eaten with a knife and fork.)

Avocado Toast: I’m Only Dedicating Ten Minutes To My Lunch
Ingredients
- 1 slice bread
- butter to toast
- 1/2 ripe avocado
- 1/3 cup shredded pepperjack cheese
- 1/4 cup diced red bell pepper
- 1/2 tsp chili powder
- lime juice to taste
Instructions
- In a small bowl, thoroughly mash 1/2 ripe avocado.
- Generously coat one side of the bread slice with butter. Place on a nonstick baking sheet and broil on LOW for 3-5 minutes, or until golden brown.
- Remove from oven, flip, and spread avocado on the soft/untoasted side of the bread.
- Top with cheese, bell pepper, and chili powder. Return to oven and broil on LOW for additional 2-4 minutes, or until cheese has melted.
- Garnish with lime juice and enjoy while warm.
Avocado Toast: Just A Little Bit Pretentious
Ingredients
- 1 slice bread
- butter to toast
- 1/2 ripe avocado
- 1/2 cup raw fresh spinach
- 1/3 cup sliced mushrooms
- 1/4 cup feta cheese
- 2-3 tbsp balsamic vinegar
- salt to taste
- black pepper to taste
- lemon juice to taste
Instructions
- In a nonstick skillet heated to medium-high, add mushrooms, spinach, balsamic vinegar, salt, and black pepper. Pan fry for 5-7 minutes, or until spinach has wilted and mushrooms have browned. Set aside.
- In a small bowl, thoroughly mash 1/2 ripe avocado.
- Generously coat one side of the bread slice with butter. Place on a nonstick baking sheet and broil on LOW for 3-5 minutes, or until golden brown.
- Remove from oven, flip, and spread avocado on the soft/untoasted side of the bread.
- Top with sauteed mushrooms/spinach, feta cheese, and lime juice. Can be enjoyed either warm or room-temperature.

Avocado Toast: The Hangover: Part IV
Ingredients
- 1 slice bread
- butter to toast
- 1/2 ripe avocado
- 2-3 slices raw thick-cut bacon
- 2 large eggs
- 2 tbsp chipotle mayo
- 1 tsp chipotle Tabasco sauce
- 1/2 tsp cilantro
Instructions
- In a large nonstick skillet, pan fry 2-3 slices thick-cut bacon until crispy.
- Without removing any rendered bacon fat from the pan*, crack one egg directly into the hot pan and position so that the how oil pools across the top of the whites. Fry until bubbling and crispy on the bottom, then repeat with the second egg.
- Meanwhile, in a small bowl, thoroughly mash 1/2 ripe avocado.
- Generously coat one side of the bread slice with butter. Place on a nonstick baking sheet and broil on LOW for 3-5 minutes, or until golden brown.
- Remove from oven, flip, and spread avocado on the soft/untoasted side of the bread.
- Top with bacon, fried eggs, chipotle mayo, hot sauce, and cilantro. Serve immediately, while eggs are still hot. (Best eaten with a knife and fork.)
Notes
The post Avocado Toast Three Ways appeared first on I Forgot Salt!.
]]>The post Bacon Buffalo Chicken Dip with Simple Garlic Crostini appeared first on I Forgot Salt!.
]]>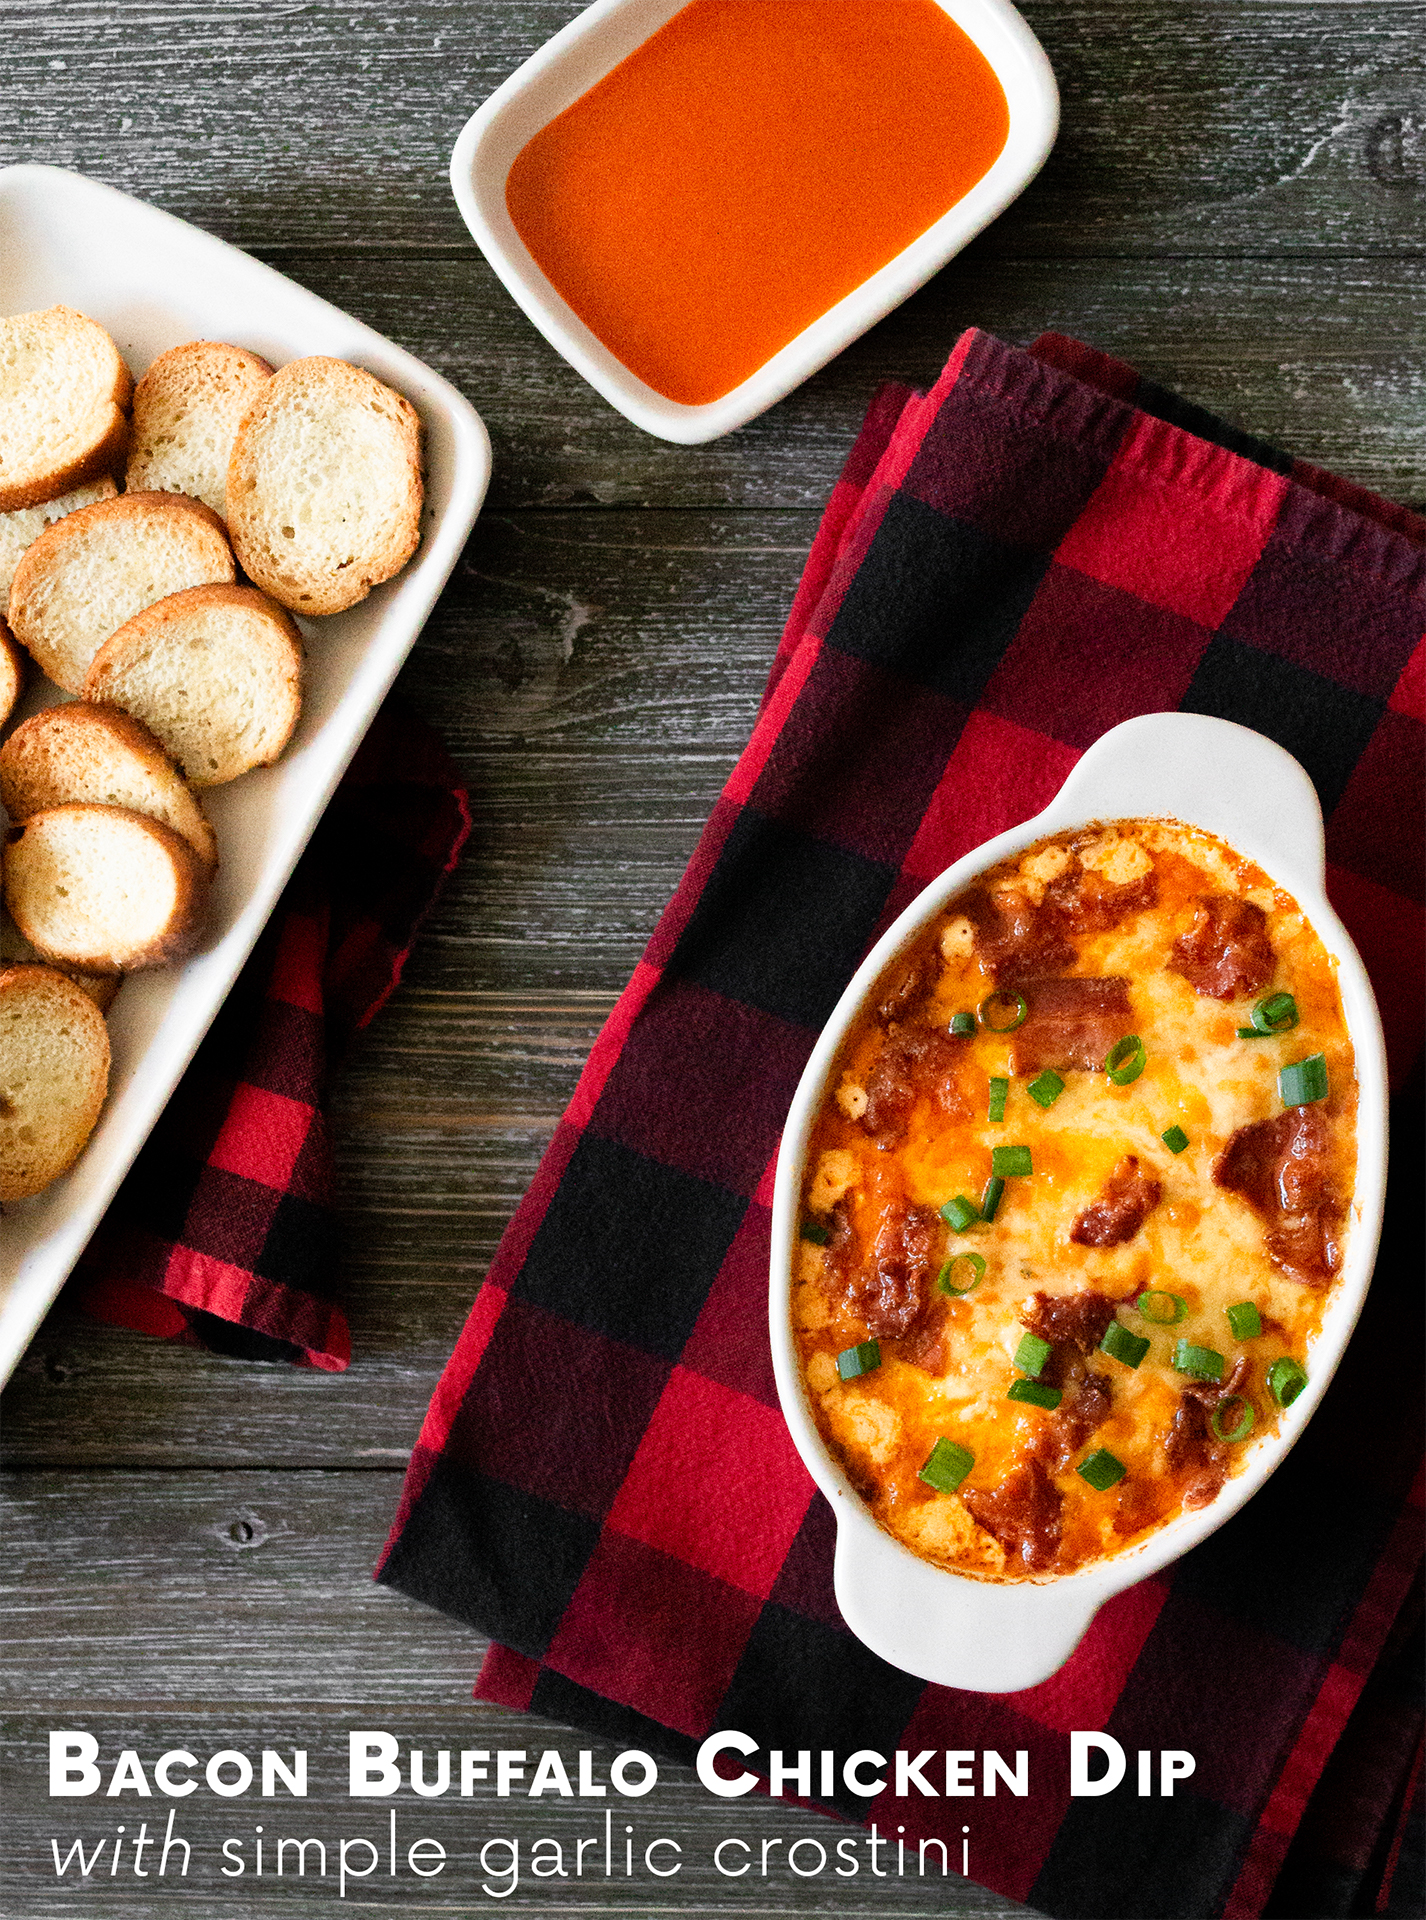
In the spirit of complete and total honesty, I have a confession to make. After I finished taking a few pictures of this buffalo chicken dip appetizer, I sat on the floor for a solid fifteen minutes shoveling bread-fulls into my mouth while it was still so hot my tongue nearly melted off. Not my finest moment for sure, but–seriously–it tasted that good. I’ve been plowing through the leftovers over the day or so since I made this recipe, munching on bagel chips because I’m too lazy to remake the garlic crostini. The next time we have friends over, I will definitely be making this!
Speaking of getting together, it’s been an incredibly busy week here in Northern VA. The good kind of busy, I promise! A group of us met up this past Saturday and learned how to make authentic tamales from my friend’s mother. It was such a fun experience, and I’m really hoping to do a write up on the whole fiasco soon. I spent so long trying to take a time-lapse video of the squad trying and failing to spread the masa on corn husks that I only ended up with a few pictures of the process itself, but the fact that I now have sixty pictures of our slightly out-of-focus confused faces more than makes up for it. Probably.
Tonight, too, I’m getting together with the same group to celebrate another friend’s birthday with pizza, games, and a slow-cooker-kept-warm batch of my chicken fra diavolo alfredo pasta. He’s a huge fan of pasta, so I thought it might be fun to bring an extra treat to the evening. I’ll be making a few tweaks to my original recipe, too. For example, instead of 2 cups of parmesan cheese, I plan to split it 30/30/30 with Gruyere and Asiago. But! That’s an experiment I’ll write more about in another post. On to the bacon buffalo chicken dip that I know you’re here for!

Like the last recipe I posted, this is actually my second attempt at making a delicious buffalo chicken dip. The first iteration was a somewhat-classic (if there even is such a thing) slow-cooker version that I made for the Super Smash Brothers Ultimate release day party we held last year. It was a huge hit, but tasted more than a little bland to me. I like my food rich and spicy! This version ticks all of those boxes. It’s smoky, salty, spicy, creamy, and oh so delicious. And as soon as I finish typing this up, I plan on eating all of the remaining leftovers for lunch.
This recipe makes 8-10 servings.
Bacon Buffalo Chicken Dip
Ingredients:
- 4 chicken thighs/2 lbs shredded rotisserie chicken
- 8oz cream cheese
- 6-7 slices thick-cut bacon
- 1 cup sharp cheddar cheese, yellow
- 1 cup extra sharp cheddar cheese, white
- 1 cup buffalo wing sauce (I used Sweet Baby Ray’s)
- 1/2 cup Greek yogurt
- 1 tsp dill weed
- 1 tsp onion powder
- 1 tsp minced onion
- 1 tsp garlic powder
- 1 tsp parsley
- 1 tsp black pepper
- 1/2 tsp salt
Directions:
- Preheat oven to 375F.
- Shred cheese as needed, combine, and set aside.
- If using raw chicken, poach chicken thighs in a large pot of salted boiling water for 20 minutes, or until completely cooked through. Alternatively, add chicken to an Instant pot with 2 cups water and pressure cook for 15 minutes. Shred with two forks and set aside.
- In a nonstick skillet, add bacon slices and fry on medium-high heat for 5-7 minutes or until browned and crispy, flipping every so often to ensure both sides have cooked evenly.
- Remove bacon from pan and set aside to cool. When handle-able, roughly chop into 1/2 inch pieces. Set aside.
- In a large pot, add cream cheese, Greek yogurt, wing sauce, dill weed, onion powder, minced onion, parsley, black pepper, and salt. Heat on medium/medium-high until cream cheese has melted and the sauce has become almost entirely liquid, stirring occasionally, about 5-7 minutes.
- Reduce heat to low and add shredded chicken, chopped bacon, and 3/4 of the shredded cheese mixture, stirring until everything is completely coated with the sauce and the added cheese has melted.
- Transfer dip to a roasting dish and top with the remaining 1/4 of the shredded cheese. Bake at 375F for 15 minutes, then broil on high for an additional 3-5 minutes, or until the layer of cheese on top has browned lightly. Remove and top with chopped green onions; serve with garlic crostini.
Simple Garlic Crostini
Ingredients:
- 1 soft baguette
- 2 tbsp garlic powder
- 2 tbsp olive oil
Directions:
- Preheat oven to 375F.
- Slice baguette into 1/2 inch thick rounds, taking care to keep the sizes relatively even.
- Spread rounds on a large baking sheet lined with parchment paper. Sprinkle 1 tbsp olive oil and 1 tbsp garlic powder onto the bread, flip each piece, and repeat with the remaining 1 tbsp olive oil and 1 tbsp garlic powder.
- Bake for 15 minutes, flipping each piece halfway through.
This recipe–both the dip and crostini–keeps well in the fridge for several days. The dip reheats marvelously in the microwave when covered with a bit of plastic wrap, and, as I mention earlier, I have been eating the leftovers for most of the week since making this dish. So good!


Bacon Buffalo Chicken Dip with Simple Garlic Crostini
Ingredients
Bacon Buffalo Chicken Dip
- 4 chicken thighs /2 lbs shredded rotisserie chicken
- 8 oz cream cheese
- 6-7 slices thick-cut bacon
- 1 cup sharp cheddar cheese yellow
- 1 cup extra sharp cheddar cheese white
- 1 cup buffalo wing sauce (I used Sweet Baby Ray's)
- 1/2 cup Greek yogurt
- 1 tsp dill weed
- 1 tsp onion powder
- 1 tsp minced onion
- 1 tsp garlic powder
- 1 tsp parsley
- 1 tsp black pepper
- 1/2 tsp salt
Simple Garlic Crostini
- 1 soft baguette
- 2 tbsp garlic powder
- 2 tbsp olive oil
Instructions
- Preheat oven to 375F.
- Shred cheese as needed, combine, and set aside.
- If using raw chicken, poach chicken thighs in a large pot of salted boiling water for 20 minutes, or until completely cooked through. Alternatively, add chicken to an Instant pot with 2 cups water and pressure cook for 15 minutes. Shred with two forks and set aside.
- Slice baguette into 1/2 inch thick rounds, taking care to keep the sizes relatively even. Spread rounds on a large baking sheet lined with parchment paper. Sprinkle 1 tbsp olive oil and 1 tbsp garlic powder onto the bread, flip each piece, and repeat with the remaining 1 tbsp olive oil and 1 tbsp garlic powder. Set aside until ready to bake.
- In a nonstick skillet, add bacon slices and fry on medium-high heat for 5-7 minutes or until browned and crispy, flipping every so often to ensure both sides have cooked evenly. Remove bacon from pan and set aside to cool. When handle-able, roughly chop into 1/2 inch pieces. Set aside.
- In a large pot, add cream cheese, Greek yogurt, wing sauce, dill weed, onion powder, minced onion, parsley, black pepper, and salt. Heat on medium/medium-high until cream cheese has melted and the sauce has become almost entirely liquid, stirring occasionally, about 5-7 minutes.
- Reduce heat to low and add shredded chicken, chopped bacon, and 3/4 of the shredded cheese mixture, stirring until everything is completely coated with the sauce and the added cheese has melted.
- Transfer dip to a roasting dish and top with the remaining 1/4 of the shredded cheese.
- Transfer both dip and baking sheet of crostini into the oven and bake at 375F for 15 minutes, flipping crostini slices halfway through.
- Remove crostini from oven. Broil dip on high for an additional 3-5 minutes, or until the layer of cheese on top has browned lightly. Serve topped with sliced green onions.
The post Bacon Buffalo Chicken Dip with Simple Garlic Crostini appeared first on I Forgot Salt!.
]]>The post Creamy Korean Udon with Eggs and Mushrooms appeared first on I Forgot Salt!.
]]>
Another near-month has gone by without a post, which seems to be something of a trend lately. It seems like no matter how motivated I am to cook, photograph, and post, something always comes up. When The Summer From Hell ended and we got engaged, I thought life would calm down, but one semester rolled into the next as time is wont to do. No rest for the wicked or the weary in this house! Both Alex and I ended up getting terribly ill in mid-October, too, and we’re just now getting over the last remnants of passing it back and forth between us more than once.
Without the ability or will to cook while severely under the weather, I spent my free time looking for new ways to improve this website. I pulled out the Craigslist-acquired DSLR I bought before travelling in 2016 and spent more than a few afternoons watching YouTube videos about the many settings and modes I’d never thought to explore, and got halfway through putting together a handmade photography board with my mom before falling sick a second time.
I also took a step away from planning meals on the fly and really sat down to think about what I wanted to cook when I finally got better. The result was a notebook full of ideas with no real way to test them, but now that I’ve finally finished this round of classes and have a few days off before we drive up to New England (a new Christmas tradition), I have plenty of free time!

This delicious korean-style udon recipe is one of those aforementioned flashes of half-fevered inspiration, although it’s technically a second iteration. My first attempt involved a dish so mushy and disintegrated that the entire thing ended up looking like a bowl of orange porridge, and I overcooked the eggs so terribly that they ended up nearly blackened on one side. Not my finest moment, for sure. The flavors were all there, though, and with a few tweaks (and a resolution not to walk away from the stove while cooking) round two was a major success!
This recipe makes 2 servings.
Ingredients:
- 1 lb (about 1 package) udon noodles
- 15-20 baby bella mushrooms
- 4 eggs
- 2 red bell peppers
- 1 cup coconut cream
- 1/2 cup Parmesan cheese
- 1/4 cup gochujang
- 1/4 cup kimchi
- 2 tbsp light oil
- 1 1/2 tbsp miso paste
- 1 tbsp peanut butter (smooth)
- 1 tbsp (about 4 cloves) garlic
- 1 tbsp (about 1 inch) ginger
- 1 tsp white pepper
- 1 tsp gochugaru/red pepper flakes
- 1 tsp sesame oil
Directions:
- Slice bell peppers in half and remove cores. Place halves skin-side up on a nonstick or parchment-lined baking sheet. Broil on high for 10-15 minutes, or until the skin has begun to bubble. Remove from oven and allow to cool slightly.
- Add roasted red peppers, gochujang, kimchi, miso paste, peanut butter, garlic, ginger, and white pepper to a blender or food processor. Blend until relatively smooth.
- Using a fine mesh strainer, strain the liquid from the blended sauce into a medium-sized pot or high-walled pan. Reserve the strained solids and set aside.
- Bring strained sauce to a boil, then reduce heat to simmer. Add coconut cream and stir until blended. Simmer for an additional 3-5 minutes, or reduce to low until all other elements are prepared.
- Prepare udon noodles according to package directions, strain, and toss with sesame oil. Set aside.
- In a small saute pan, add the strained sauce solids, 1 tsp light oil, and mushrooms. Fry on medium-high heat for 5-7 minutes, or until the mushrooms have begun to crisp. Remove from heat and set aside.
- In a large nonstick skillet, add the remaining light oil and heat to high. When the oil has begun to lightly sizzle, crack 1 egg into the pan and fry for 2-3 minutes, or until the whites have completely cooked but the yolk remains runny. Repeat with the three remaining eggs. (Note: The eggs will bubble and pop while frying, so I recommend tilting the pan away from you as you’re cooking. Don’t step away from the stove! Eggs cook very quickly and will easily burn if left unattended.)
- Add gochugaru and cooked udon noodles to the warm sauce, and toss to coat completely. Serve topped with fried mushrooms, 1/4 cup Parmesan cheese, and two fried eggs each. Enjoy!
This recipe reheats reasonably well in the microwave, although I would not recommend storing cooked eggs in the fridge overnight. The noodle and mushroom portion, however, could be a great lunch option if you’re looking for something different!
This recipe was also inspired by PureWow’s Gochujang Zoodles, largely because I’d never even considered using kimchi as anything other than a topping or side dish before coming across their recipe on Pinterest. Go check it out!


Creamy Korean Udon with Fried Eggs and Mushrooms
Equipment
- fine mesh strainer
- blender/food processor
Ingredients
- 1 lb udon noodles about 1 package
- 15-20 baby bella mushrooms
- 4 eggs
- 2 red bell peppers
- 1 cup coconut cream
- 1/2 cup Parmesan cheese
- 1/4 cup gochujang
- 1/4 cup kimchi
- 2 tbsp light oil
- 1 1/2 tbsp miso paste
- 1 tbsp peanut butter smooth
- 1 tbsp garlic about 4 cloves
- 1 tbsp ginger about 1 inch
- 1 tsp white pepper
- 1 tsp gochugaru/red pepper flakes
- 1 tsp sesame oil
Instructions
- Slice bell peppers in half and remove cores. Place halves skin-side up on a nonstick or parchment-lined baking sheet. Broil on high for 10-15 minutes, or until the skin has begun to bubble. Remove from oven and allow to cool slightly.
- Add roasted red peppers, gochujang, kimchi, miso paste, peanut butter, garlic, ginger, and white pepper to a blender or food processor. Blend until relatively smooth.
- Using a fine mesh strainer, strain the liquid from the blended sauce into a medium-sized pot or high-walled pan. Reserve the strained solids and set aside.
- Bring strained sauce to a boil, then reduce heat to simmer. Add coconut cream and stir until blended. Simmer for an additional 3-5 minutes, or reduce to low until all other elements are prepared.
- Prepare udon noodles according to package directions, strain, and toss with sesame oil. Set aside.
- In a small saute pan, add the strained sauce solids, 1 tsp light oil, and mushrooms. Fry on medium-high heat for 5-7 minutes, or until the mushrooms have begun to crisp. Remove from heat and set aside.
- In a large nonstick skillet, add the remaining light oil and heat to high. When the oil has begun to lightly sizzle, crack 1 egg into the pan and fry for 2-3 minutes, or until the whites have completely cooked but the yolk remains runny. Repeat with the three remaining eggs.*
- Add gochugaru and cooked udon noodles to the warm sauce, and toss to coat completely. Serve topped with fried mushrooms, 1/4 cup Parmesan cheese, and two fried eggs each. Enjoy!
Notes
The post Creamy Korean Udon with Eggs and Mushrooms appeared first on I Forgot Salt!.
]]>